Quick answer: AC Not Blowing Cold / Recharge on a 2019–2024 Chevrolet Silverado 1500 is rated Moderate and takes about 30-60 minutes. You'll need 2 tools for this job, and parts cost about $45. This guide walks you through the full job step by step, including the mistakes to avoid.
| Part Name |
Part Number |
Price |
Buy |
| Correct refrigerant DIY kit with gauge (R-134a or R-1234yf as labeled) |
— |
$45.00 |
|
| AC leak detect dye (optional) Optional |
— |
$12.00 |
|
About prices: shown prices are typical retail averages and change frequently; cheaper alternatives may be available. Confirm the current price before buying.
💡 Pro tip: Order all parts at once to save on shipping
Step-by-Step Instructions
Follow these steps carefully
1
Confirm refrigerant type and symptoms
Read the under-hood A/C label (SAE J639) — it names the refrigerant and charge weight. The 2019+ Silverado 1500 (T1) uses R-1234yf — but a leftover 2019 'LD'/Legacy old-body truck can use either refrigerant, so the label is the final word on 2019s. Confirm warm vents on MAX A/C with recirc, and check the cabin filter behind the glove box: weak airflow mimics low charge.
🔧 Mechanic's note — Ray Delgado
In my experience, If your 2019 Silverado is the old-body 'LD' truck, it can take either refrigerant — that's the one case where the label isn't a formality, it's the entire answer. Check it before you buy the kit.
2
Prep and find the low-side port
Engine OFF. The low-side port sits on the larger suction line from the firewall evaporator to the compressor — follow it to the cap marked 'L'. The DIY hose clicks only onto that coupler; if it won't click, stop (wrong port or refrigerant family). Never force it or use adapters, and never touch the high-side 'H' cap.
3
Baseline pressure with A/C on
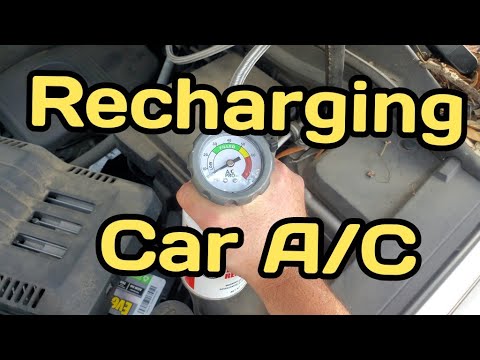
Start the engine: MAX A/C, coldest setting, recirc ON, blower on high. After 2-3 minutes, connect the gauge to the low-side port and compare against your kit's ambient-temperature chart. Near zero? Stop — an empty system needs professional evacuation, leak repair, and recharge by weight; a top-off won't fix it and liquid slugging can destroy the compressor.
4
Add refrigerant in short bursts
With the system running, add refrigerant in 5-10 second bursts with the can upright — vapor only, never inverted; liquid reaching the compressor can destroy it. Pause and re-check the gauge and vent temperature between bursts, aiming for the middle of the chart: overcharging raises head pressure and hurts cooling. R-1234yf is mildly flammable (ASHRAE A2L) — no flames, no smoking, ventilate. Never vent refrigerant; recovery needs EPA Section 609 equipment. Skip stop-leak cans: sealants clog the expansion valve or orifice tube.
🔧 Mechanic's note — Tom Becker
I keep the can upright with a rag under it the whole time. If it tips mid-burst, liquid slugs straight into the compressor — a mistake that totals the compressor in seconds.
5
Stop criteria and wrap-up
Stop when low-side pressure matches the ambient chart and center vents blow cold (high-30s to mid-40s F on MAX). Disconnect the hose and firmly reinstall the 'L' cap — it's the primary seal — then recheck cooling after a short drive. Cooling fades within days? You have a leak: get a UV-dye inspection or shop leak-down test, not another can. Repeated top-offs without a repair waste money and risk the compressor.
All Done!
Test your repair before closing everything up. If something doesn't work right, double-check your steps.
⚠️ Common Mistakes to Avoid
- • Using the wrong refrigerant (R-134a vs R-1234yf)
- • Overcharging by watching can weight instead of gauge + vent temp
- • Recharging an empty or badly leaking system
- • Connecting to the high-side port