Quick answer: Engine Air Filter Replacement on a 1997–2005 Chevrolet Venture is rated Easy and takes about 15–25 minutes. You'll need 1 tool for this job, and parts cost about $35. This guide walks you through the full job step by step, including the mistakes to avoid.
| Part Name |
Part Number |
Price |
Buy |
| Engine air filter for 1997-2005 Chevrolet Venture; verify engine, housing shape, and VIN fitment |
— |
$35.00 |
|
About prices: shown prices are typical retail averages and change frequently; cheaper alternatives may be available. Confirm the current price before buying.
💡 Pro tip: Order all parts at once to save on shipping
Step-by-Step Instructions
Follow these steps carefully
1
Get oriented in a crowded bay
Pop the hood. The 3.4L V6's airbox sits low and looks buried behind the duct, wiring, and hoses — that's normal, don't remove any of it. Grab a flat-blade screwdriver or 8mm nut driver. Engine off, keys out.
🔧 Mechanic's note — Tom Becker
The first-timers in my shop always think something has to come off to reach that box — nothing does. It looks buried, but the duct and cover lift out as one piece.
2
Loosen the two intake duct clamps
Loosen the clamp at the MAF housing and the one at the throttle body — just back them off, don't remove. Original clamps are stiff; work them gradually instead of muscling.
3
Disconnect the duct’s sensors and tubes
Pull the IAT sensor (small two-wire sensor, back of duct near throttle body) straight out of its grommet — never by the wires. Disconnect the vent tube, squeeze the MAF tab and unplug. The MAF stays bolted to the duct.
4
Lift off the duct and cover as one assembly
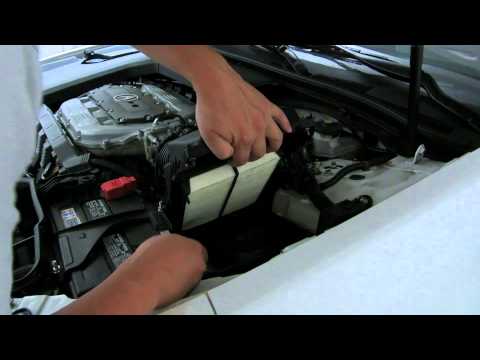
Unlatch the airbox cover clips; lift duct + cover off as one assembly. Set it down MAF-side up so nothing touches the sensor. The old panel filter is now exposed.
5
Remove the filter and clean the box
Lift out the old filter, noting orientation. Vacuum the box bottom and check for cracks — 20 years of heat makes this plastic brittle. Wipe any oil film or debris from the duct.
6
Reassemble everything you touched
Drop the new filter in, same orientation as the old. Reseat the duct-and-cover and latch the clips. Push the duct fully onto both joints before snugging the clamps — half-on blows off under load. Reconnect IAT, vent tube, MAF (click).
🔧 Mechanic's note — Ray Delgado
A duct that's only half-seated will blow off the first time you floor it — ask me how I know. Push it fully home before you touch the clamps.
7
Start it and listen
Start the engine. Forgotten MAF connector = rough idle + check-engine light immediately — shut off and reconnect. Whistling means a clamp or vent tube isn't seated. Confirm smooth idle on a short drive. Inspect the filter every 12,000–15,000 miles or yearly.
🔧 Mechanic's note — Tom Becker
In my experience, if it idles rough right after this job, it's the MAF connector you forgot — happens to everyone once. Five-second fix.
All Done!
Test your repair before closing everything up. If something doesn't work right, double-check your steps.
⚠️ Common Mistakes to Avoid
- • Forgetting to reconnect the MAF electrical connector — instant rough idle and check-engine light
- • Cracking the brittle 20-year-old plastic intake duct by prying instead of loosening the clamps
- • Leaving the small vent tube disconnected, causing a vacuum leak and whistle
- • Tightening a duct clamp before the duct is pushed fully onto the throttle body