Quick answer: Engine Air Filter Replacement on a 2006–2011 Cadillac DTS is rated Easy and takes about 10–15 minutes. You'll need 1 tool for this job, and parts cost about $35. This guide walks you through the full job step by step, including the mistakes to avoid.
| Part Name |
Part Number |
Price |
Buy |
| Engine air filter for 2006-2011 Cadillac DTS; verify engine, housing shape, and VIN fitment |
— |
$35.00 |
|
About prices: shown prices are typical retail averages and change frequently; cheaper alternatives may be available. Confirm the current price before buying.
💡 Pro tip: Order all parts at once to save on shipping
Step-by-Step Instructions
Follow these steps carefully
1
Park it, pop the hood, find the air cleaner
Park level, engine off and cool. The air cleaner is the big black plastic box on the driver's side, feeding the 4.6L Northstar V8. The exhaust manifolds sit close and stay hot, so let the engine cool first.
2
Release the cover fasteners
The cover is held by clips or screws around its edge — release them all before touching the lid. Don't force it with one fastener still holding; the old plastic cracks instead of flexing. Keep track of every fastener.
3
Lift the cover off
Lift the cover straight up and set it aside upside-down so dirt doesn't fall back in. Check the edge seal — if flattened or cracked, the box has let dirty air past the filter; replace a tired seal while you're in there.
4
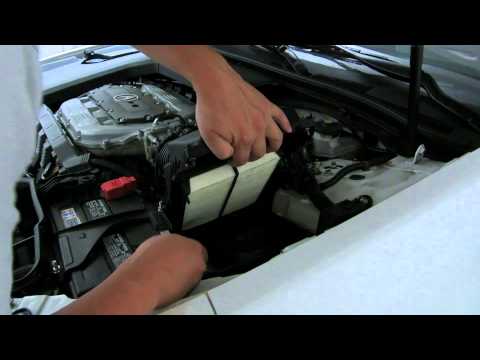
Pull the old filter
Lift the old filter out, noting the gasket position — the new one goes back the same way. On the Northstar these load up fast — hold the old element up to the light; if you can't see through the pleats, it was overdue.
🔧 Mechanic's note — Ray Delgado
My rule: On the Northstar these filters load up fast, and a dirty one can cost 1-3 mpg. Hold the old element to the light — if you can't see through the pleats, the engine's been working harder than it had to.
5
Clean the housing
Vacuum or wipe out the bottom of the housing — sand and leaves settle in the low corners. Block the intake opening with a loosely stuffed rag while you work. Pull the rag out before the new filter goes in.
6
Seat the new filter
Drop the new filter into the tray in the same orientation, gasket side seating flat all the way around. No gaps, no rocking — press the edges to confirm it's fully home. A crooked filter lets unfiltered air in.
7
Close up and verify
Set the cover back on evenly and refasten every clip or screw — a missing fastener lets the lid gap. Close the hood and start the engine, listening for a whistle or rough idle. Replace yearly or every 20,000 miles.
All Done!
Test your repair before closing everything up. If something doesn't work right, double-check your steps.
⚠️ Common Mistakes to Avoid
- • Forcing the cover with a fastener still holding — the plastic on these cars is old and cracks instead of flexing, and then the box never seals again.
- • Leaving a fastener off because most of them are in — a missing clip or screw lets the lid gap and bypass the filter.
- • Letting grit fall into the intake opening while the housing is open.
- • Installing the filter cocked sideways so the gasket doesn’t seal — check that it sits flat before the cover goes on.