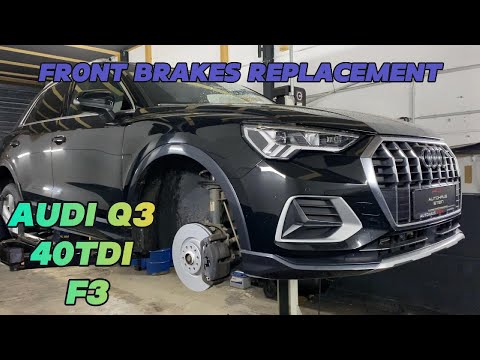
Quick answer: Brake Pad Replacement on a 2015–2018 Audi A3 is rated Advanced and takes about 1-3 hours. You'll need 3 tools for this job, and parts cost about $205. This guide walks you through the full job step by step, including the mistakes to avoid.
| Part Name |
Part Number |
Price |
Buy |
| Front or rear brake pad set for 2015-2018 Audi A3; verify axle, brake package, and VIN fitment |
— |
$180.00 |
|
| Replacement pad hardware or wear sensor only if the kit requires it |
— |
$25.00 |
|
About prices: shown prices are typical retail averages and change frequently; cheaper alternatives may be available. Confirm the current price before buying.
💡 Pro tip: Order all parts at once to save on shipping
Step-by-Step Instructions
Follow these steps carefully
1
Confirm the front brake setup
The 2015-2018 A3 (8V) uses single-piston floating calipers. Order front pads plus a wear sensor — one front wheel carries it and the old one is usually brittle. Check rotors for a lip and scoring; A3 rotors are often replaced with the pads.
🔧 Mechanic's note — Tom Becker
I never trust the A3's dash warning alone — that sensor only fires when the pad is nearly gone. I always sight-check the pad thickness through the caliper before ordering parts.
2
Lift and secure the A3
Park level, chock rear wheels, and set the parking brake. Break wheel bolts loose on the ground — the A3 uses bolts, so keep one loosely threaded while jacking. Raise onto stands, remove the wheel, and turn the steering toward the side you're working on.
3
Remove the caliper and old pads
Pop the guide-pin dust caps off, pry the anti-rattle spring off, and remove the two HEX H7 guide bolts. Lift the caliper off the rotor and tie it to the strut — never by the hose. Unplug the wear sensor and slide out the pads.
4
Prep the hardware and retract the piston
Clean the bracket's pad slides and check rotor thickness against the wear limit. Grease the pad contact points, keeping grease off the friction faces. Re-grease the pins with silicone brake grease. Siphon the reservoir below MAX, then push the piston back with a C-clamp.
🔧 Mechanic's note — Ray Delgado
I always check the reservoir before pushing the piston back — on the A3 the displaced fluid rises fast, and I'd rather siphon a little out than mop brake fluid off painted parts.
5
Install pads, torque, pump, and bed in
Seat the pads, slide the caliper over, and torque the HEX H7 bolts to 30 N·m. Refit the dust caps and spring, reconnect the wear sensor, and refit the wheel. Torque the bolts to spec, pump the pedal until firm, then bed the pads.
🔧 Mechanic's note — Tom Becker
I bed fresh A3 pads with a series of moderate stops from about 40 mph with cool-down between them — I never do hard panic stops on brand-new pads, since that can glaze the lining.
All Done!
Test your repair before closing everything up. If something doesn't work right, double-check your steps.
⚠️ Common Mistakes to Avoid
- • Changing only one pad or mixing pad sets on an axle
- • Working under a vehicle supported only by a jack
- • Letting the caliper hang from the brake hose
- • Forcing a seized piston or ignoring a leaking caliper
- • Skipping final lug and caliper torque or the bedding procedure