1
Warm up and park
Run the engine a few minutes so the oil flows freely, then park on level ground and shut it off. Set the parking brake and chock the rear wheels.
2024–2026 Ford Ranger
By Ray Delgado ✓ Certified Mechanic · Published Sep 24, 2026 · Updated Oct 22, 2026
Save $120 by doing it yourself! Shop cost: $174
Quick answer: Engine Oil and Filter Change on a 2024–2026 Ford Ranger is rated Easy and takes about 45 minutes. You'll need 8 tools for this job, and parts cost about $54. This guide walks you through the full job step by step, including the mistakes to avoid.
| Part Name | Part Number | Price | Buy |
|---|---|---|---|
| Engine Oil (5W-30 full synthetic) | — | $39.00 | |
| Cartridge oil filter element plus housing O-ring | — | $15.00 | |
| Drain plug washer (if equipped) Optional | — | $6.00 |
About prices: shown prices are typical retail averages and change frequently; cheaper alternatives may be available. Confirm the current price before buying.
💡 Pro tip: Order all parts at once to save on shipping
Follow these steps carefully
Run the engine a few minutes so the oil flows freely, then park on level ground and shut it off. Set the parking brake and chock the rear wheels.
The 2024-plus Ranger has decent ground clearance, but ramps or jack stands give much better access to the drain plug. If you lift it, support it properly — never rely on the jack alone.
Open the hood and remove the oil fill cap to vent the crankcase. Underneath, find the oil pan drain plug at the rear of the pan and position your drain pan beneath it.
Loosen the drain plug, finish removing it by hand while pressing inward, and let the oil stream into the pan. Allow a full ten minutes of draining so the last dirty quart makes it out.
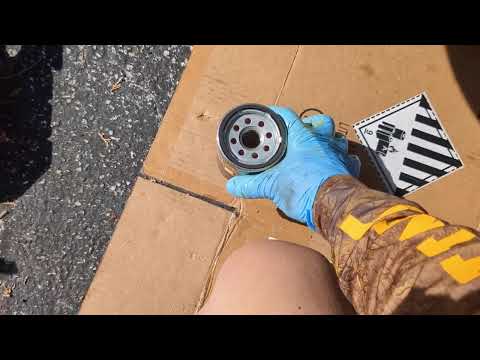
On the 2.3L EcoBoost, find the cartridge housing and remove the cap with the correct socket. Lift out the old cartridge and O-ring; fit the new O-ring coated with fresh oil, drop in the new cartridge, reinstall the cap snugly.
Thread the drain plug back in by hand first to prevent cross-threading, then tighten it firmly. Pour in the full-synthetic 5W-30 (or the viscosity your owner's manual specifies) through a funnel, using the dipstick to avoid overfilling.
Thread that drain plug in by hand first — every cross-threaded oil pan I've repaired started with a wrench. Once it's finger-tight and straight, then snug it down.
Start the engine for about a minute, watching underneath for drips at the plug and filter housing. Shut it off, wait two minutes, then verify the dipstick reads between the marks and top off if needed.
Reset the oil-life reminder through the instrument cluster menu so your next interval tracks correctly. Funnel the used oil into sealed jugs and return it to a parts store for recycling.
Test your repair before closing everything up. If something doesn't work right, double-check your steps.
⚠️ Common Mistakes to Avoid

2024–2026

2024–2026

2019–2023

2019–2023

2019–2023

2019–2023

Acura ILX · 2013–2022

Acura RDX · 2010–2012

Acura RDX · 2019–2024

Acura RL · 2005–2012
Acura RLX · 2014–2020

Acura TL · 2004–2008

Acura TSX · 2009–2014

Acura ZDX · 2010–2013


