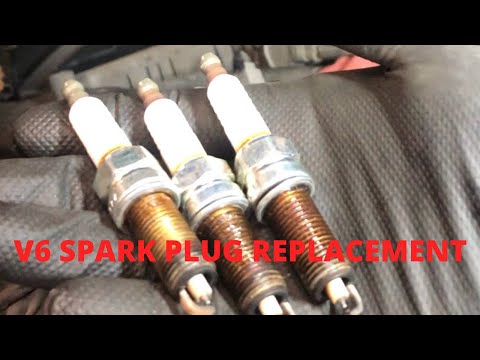
Quick answer: Spark Plug Replacement on a 2013–2018 Hyundai Santa Fe is rated Advanced and takes about 1-3 hours. You'll need 4 tools for this job, and parts cost about $115. This guide walks you through the full job step by step, including the mistakes to avoid.
| Part Name |
Part Number |
Price |
Buy |
| Correct spark plug set for 2013-2018 Hyundai Santa Fe; verify engine, heat range, gap, and VIN fitment |
— |
$115.00 |
|
| Coil-boot seals or ignition coils only if inspection finds damage Optional |
— |
$35.00 |
|
| New intake-plenum and throttle-body gaskets |
— |
— |
|
About prices: shown prices are typical retail averages and change frequently; cheaper alternatives may be available. Confirm the current price before buying.
💡 Pro tip: Order all parts at once to save on shipping
Step-by-Step Instructions
Follow these steps carefully
1
Confirm engine and plug fitment
This guide covers the 2013–2018 Hyundai Santa Fe with the 3.3-liter Lambda GDI V6, which takes six plugs. The OE plug is the NGK SILZKR7B11 Laser Iridium (NGK stock 9723), gapped at 1.1 mm (0.043 in.). The 2.4L GDI four-cylinder uses this same plug, but the 2.0L turbo takes a different one — confirm your engine and the part number against your VIN before buying. Budget for new intake-plenum and throttle-body gaskets at the same time, because the rear bank sits under the intake plenum and you will be removing it to reach those three plugs.
🔧 Mechanic's note — Ray Delgado
The rear-bank surprise is what bites people — three plugs hide under the intake plenum, and you need new plenum and throttle-body gaskets to get them. I order the gaskets with the plugs, because nobody wants the car apart waiting on a gasket.
2
Cool and expose the plugs
Let the engine cool fully — the aluminum heads must be cold before plugs come out. Disconnect the battery's negative terminal and remove the plastic engine cover. Remove the intake ducting, throttle body, and upper plenum, labeling every vacuum hose, PCV line, and connector. Stuff clean rags into the open intake ports.
3
Remove coils and clean wells
Blow every plug well out with compressed air BEFORE loosening a plug; years of debris collect under the plenum. Inspect each coil boot for cracks, swelling, or carbon tracking; GDI cylinder pressures punish weak boots, and a bad boot causes the exact misfire you're curing.
🔧 Mechanic's note — Ray Delgado
Blowing the wells out before loosening a plug is the cheapest insurance on this engine — I've seen years of grit live under that plenum, and one grain between the plug and the head will score the seat and leak compression.
4
Remove and install plugs
Using a 16 mm (5/8 in.) spark plug socket with an extension, remove each old plug and compare it to the new NGK SILZKR7B11. Confirm the 1.1 mm (0.043 in.) gap with a wire gauge — never lever against the fragile iridium tip to adjust it. NGK's threads carry a trivalent plating, so install the plugs dry with no anti-seize. Thread each plug in by hand until it seats to avoid cross-threading the aluminum head, then tighten to Hyundai's torque spec. Do not overtighten — a stripped rear-bank thread with the intake apart is a very bad day.
🔧 Mechanic's note — Tom Becker
Iridium tips are glass-fragile — I check the 1.1 mm gap with a wire gauge and never touch the center electrode. One careless adjustment lever ruins a plug that was perfect out of the box.
5
Reconnect and verify
Reinstall the coils and reconnect every clip, then refit the upper plenum with the NEW gaskets, followed by the throttle body and ducting — double-check every vacuum hose and connector is back where it came from, since a missed hose sets lean codes immediately.
All Done!
Test your repair before closing everything up. If something doesn't work right, double-check your steps.
⚠️ Common Mistakes to Avoid
- • Using the wrong plug or assuming a pre-gapped plug needs no verification
- • Blowing debris into an open cylinder or plug well
- • Cross-threading a plug or tightening it without a torque wrench
- • Overusing anti-seize or dielectric grease on the plug threads
- • Mixing coil connectors or ignoring a misfire after reassembly