Quick answer: Oil and Filter Change on a 2013–2015 Chevrolet Malibu is rated Easy and takes about 30–45 minutes. You'll need 8 tools for this job, and parts cost about $40. This guide walks you through the full job step by step, including the mistakes to avoid.
Oil spec
2.5L 4-cyl (LCV/LKW)
Capacity 5.0 qt with filter Viscosity 5W-20 (alt: 0W-20, 0W-30) Spec dexos1
| Part Name |
Part Number |
Price |
Buy |
| 5W-20 dexos engine oil (5 quarts) |
— |
$30.00 |
|
| Cartridge oil filter with O-ring |
— |
$10.00 |
|
About prices: shown prices are typical retail averages and change frequently; cheaper alternatives may be available. Confirm the current price before buying.
💡 Pro tip: Order all parts at once to save on shipping
Step-by-Step Instructions
Follow these steps carefully
1
Warm up and set up
Idle your Chevrolet Malibu's 2.5L two to three minutes so the oil warms up, then shut it off. Gather a 15mm socket for the drain plug (confirm fit — some cars use 13mm), an oil-filter wrench, a new spin-on filter, 5.0 quarts of dexos1 Gen 3 5W-20, a funnel, and a drain pan. Raise the front on jack stands or ramps on level ground — never work under a car held only by a jack.
🔧 Mechanic's note — Ray Delgado
My shop habit: Raise the front on jack stands or ramps on level ground — never work under a car held only by a jack.
2
Filler cap off, locate the filter
Pop the hood and remove the oil filler cap, then lift the dipstick slightly to vent the crankcase. Note: the 2.5L LCV uses a conventional spin-on filter, not a cartridge — it screws onto the front of the block and is reached from underneath, so don't hunt for a filter cap up top.
🔧 Mechanic's note — Tom Becker
This is the part I see people get wrong: the 2.5L uses a spin-on filter underneath, so I don't hunt for a cartridge cap up top like I did the first time.
3
Drain the oil from below
Slide the drain pan under the oil pan and crack the drain plug loose with the 15mm socket, then spin it out by hand, keeping pressure so it doesn't fall in. Let all five quarts drain until the stream becomes an occasional drip. Thread the plug back in by hand to avoid cross-threading, then torque it to 18 ft-lb.
🔧 Mechanic's note — Tom Becker
Don't learn this the expensive way like I did: I thread the plug in by hand, then torque to 18 ft-lb — I've cross-threaded one rushing.
4
Install the spin-on filter
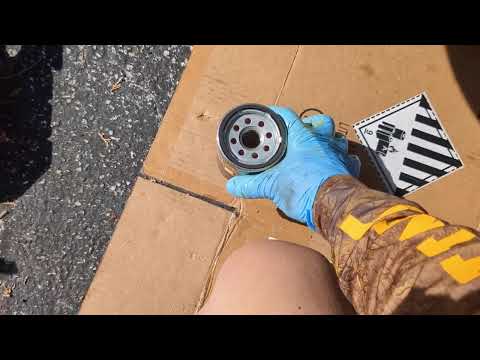
From below, spin the spin-on filter off the front of the block slowly with the filter wrench, keeping it upright. Wipe the mounting boss and confirm the old gasket came away with the filter — a doubled gasket leaks. Oil the new filter's gasket, pre-fill it halfway, spin it on until the gasket seats, then tighten to 22 lb-ft per GM's procedure. The LCV's filter mount faces slightly downward, so pre-fill the new filter only halfway. A full one spills on the way up, so wipe the mount clean before spinning the filter on.
5
Refill and verify
Set a funnel in the filler neck and pour in 5.0 quarts of dexos1 Gen 3 5W-20. Start the engine, idle a minute, and watch the filter and drain plug for leaks while the oil pressure builds.
6
Reset the monitor and recycle
Reset the oil-life monitor through the driver information center (it should read 100%), then do a final dipstick check. Recycle the used oil at any auto-parts store, and jot down the mileage and date for next time.
All Done!
Test your repair before closing everything up. If something doesn't work right, double-check your steps.
⚠️ Common Mistakes to Avoid
- • Reusing the old O-ring.
- • Stripping the drain plug.
- • Using non-dexos oil.