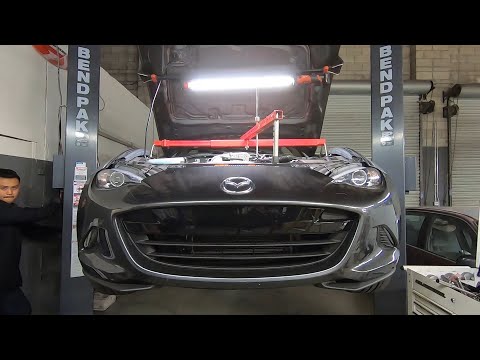
Quick answer: Battery Replacement on a 2016–2024 Mazda MX-5 is rated Easy and takes about 30-90 minutes. You'll need 2 tools for this job, and parts cost about $180. This guide walks you through the full job step by step, including the mistakes to avoid.
| Part Name |
Part Number |
Price |
Buy |
| Replacement 12-volt battery for 2016-2024 Mazda MX-5; verify group size, CCA, terminal layout, and VIN fitment |
— |
$180.00 |
|
| Anti-corrosion terminal protectant or felt washers (optional) Optional |
— |
$8.00 |
|
About prices: shown prices are typical retail averages and change frequently; cheaper alternatives may be available. Confirm the current price before buying.
💡 Pro tip: Order all parts at once to save on shipping
Step-by-Step Instructions
Follow these steps carefully
1
Confirm the compact engine-bay battery
The 2016-2024 Mazda MX-5 (ND generation) uses a compact 12-volt battery in the engine bay, commonly cataloged as a Group 51R (around 450 CCA), rather than the trunk-mounted U1R unit of the older NA/NB Miatas. Read the group size, CCA, and terminal layout from the label on your existing battery or your owner's manual before buying, since owners sometimes fit alternate small batteries. Confirm the battery is the real problem first: slow cranking, dim lights, a charging warning, or a battery older than four years point to replacement, while a battery that drains while parked may signal a parasitic draw or alternator issue instead.
2
Park and power down
Park the MX-5 on level ground, set the parking brake, switch the ignition fully off, and take the key fob away from the car. Wear safety glasses and gloves, and keep metal tools away from the battery posts.
3
Disconnect and remove the old battery
Locate the small battery in the engine bay and note how the top tie-down bar sits across it. Loosen the nuts on the tie-down bar, unhook the J-shaped bars from the tray brackets, and set the assembly aside. Loosen the 10mm nut on the negative (-) cable clamp, pull the cable straight off the post, and tuck it away from metal. Do the same for the positive (+) cable. Lift the compact battery straight out of the tray with both hands, keeping it upright, and compare it side by side with your new battery for size and terminal layout.
4
Reconnect the cables
Reconnect the positive (+) cable first, then the negative (-), snugging each clamp nut until the cable cannot twist on the post. A light film of petroleum jelly on the terminals helps prevent future corrosion on this exposed engine-bay installation.
5
Start up and verify operation
Start the MX-5 and check that no warning lights remain on. Reset the clock and radio presets if they were lost during the swap. Verify charging voltage is roughly 13.5 to 14.8 volts with the engine running to confirm the alternator is healthy. Take a short drive and confirm the car starts crisply; the engine management may need a few drive cycles to fully settle after the power interruption. Stop and recheck your work if the battery feels hot or the charging warning stays lit, and recycle the old battery for the core refund.
All Done!
Test your repair before closing everything up. If something doesn't work right, double-check your steps.
⚠️ Common Mistakes to Avoid
- • Buying by appearance instead of group size, CCA, polarity, and hold-down fit
- • Shorting the positive terminal to the body with a metal tool
- • Lifting the battery by damaged terminals or leaving it unsecured
- • Skipping battery registration, window/clock resets, or charging-system checks when required
- • Assuming a new battery fixes a parasitic draw or charging fault