Quick answer: Engine Air Filter Replacement on a 1990–1996 Nissan 300ZX is rated Easy and takes about 15–30 minutes. You'll need 2 tools for this job, and parts cost about $35. This guide walks you through the full job step by step, including the mistakes to avoid.
| Part Name |
Part Number |
Price |
Buy |
| Engine air filters (pair) for 1990-1996 Nissan 300ZX; verify engine, housing shape, and VIN fitment |
— |
$35.00 |
|
About prices: shown prices are typical retail averages and change frequently; cheaper alternatives may be available. Confirm the current price before buying.
💡 Pro tip: Order all parts at once to save on shipping
Step-by-Step Instructions
Follow these steps carefully
1
Know what you’re dealing with
The Z32's airbox sits under the center nose panel between the headlights, holding TWO side-by-side panel filters — same on all 1990–1996 cars, NA or turbo. Grab a 10mm socket/ratchet (extension helps) and a large Phillips. Engine off, cool.
2
Remove the center nose panel
Remove the four topmost 10mm bolts across the radiator support (one hides under the hood latch) — only those four. Don't pry the snug panel: lift slightly, push/pull toward the engine, wiggle side to side. It's painted — set it somewhere safe.
🔧 Mechanic's note — Tom Becker
That nose panel is painted bodywork — lay it on a blanket, not the driveway. And only those four top bolts; I've watched people start pulling headlight hardware.
3
Open the airbox housing
Release the four side clips (two per side). Loosen — don't remove — the big center-hose clamp with the large Phillips. Push the whole housing back toward the engine until its front clears, then lift out. Straight up doesn't work.
🔧 Mechanic's note — Ray Delgado
I've found that the trick is pushing the housing backward first — fighting it straight up is how housings get cracked. Every Z owner learns this one the hard way.
4
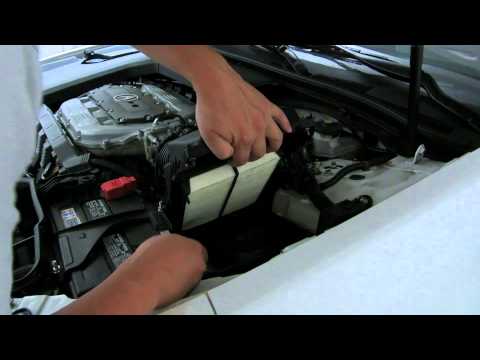
Pull both filters and inspect
Pull both filters, noting orientation. Vacuum the housing; check for cracks — 30-year-old Nissan plastic is brittle. Inspect the center hose for dry-rot/splits and the foam body seal; crumbling seal lets unfiltered air in.
5
Install the new pair
Drop both new filters in, same orientation, sitting flat. Replace both even if one looks clean — they share the load and the 'clean' one holds invisible fine dust.
6
Reassemble and seal the intake
Reseat the housing and snug the center-hose clamp — critical seal: the VG30's hot-wire MAF sits right after it, and unmetered air causes idle problems. Snap the four clips, refit the nose panel and four 10mm bolts.
🔧 Mechanic's note — Tom Becker
I've learned that that center clamp is the whole job's weak point — any leak there feeds the MAF unmetered air and you'll chase a hunting idle for weeks. Snug it properly.
7
Verify idle quality and set the interval
Start and idle. The VG30 is leak-sensitive — rough/hunting idle right after means the center clamp or a clip isn't sealed; recheck before driving. Confirm no check-engine light on a short drive. Inspect both filters every 15,000–30,000 miles (more in dust).
All Done!
Test your repair before closing everything up. If something doesn't work right, double-check your steps.
⚠️ Common Mistakes to Avoid
- • Dropping one of the four nose-panel bolts down into the bumper cavity
- • Prying the snug nose panel instead of wiggling it free, cracking the paint or panel
- • Replacing only one of the two panel filters
- • Leaving the center-hose clamp loose, letting unmetered air past the MAF and causing idle problems