Quick answer: Battery Replacement on a 2005–2009 Nissan Armada is rated Easy and takes about 30-90 minutes. You'll need 2 tools for this job, and parts cost about $180. This guide walks you through the full job step by step, including the mistakes to avoid.
| Part Name |
Part Number |
Price |
Buy |
| Replacement 12-volt battery for 2005-2009 Nissan Armada; verify group size, CCA, terminal layout, and VIN fitment |
— |
$180.00 |
|
| Anti-corrosion terminal protectant or felt washers (optional) Optional |
— |
$8.00 |
|
About prices: shown prices are typical retail averages and change frequently; cheaper alternatives may be available. Confirm the current price before buying.
💡 Pro tip: Order all parts at once to save on shipping
Step-by-Step Instructions
Follow these steps carefully
1
Confirm the Group 24F battery and symptoms
The 2005-2009 Nissan Armada uses a BCI Group 24F 12-volt battery, originally rated around 650 CCA, to crank its 5.6L V8. Read the group size and CCA from the label on your existing battery before buying, and match or exceed the original rating. Confirm the battery is truly the problem first: slow cranking, a clicking starter, dim lights, a charging warning, or a battery older than four years point to replacement, while a battery that keeps going flat overnight can signal a parasitic draw or a failing alternator instead. Also check the negative-terminal battery current sensor and its wiring while you are in there, since a damaged sensor can mimic charging problems on this platform.
2
Park and power down
Park the Armada on level ground, shift to Park, set the parking brake, and switch the ignition off. Remove the key from the ignition. Open the hood and secure it with the prop rod. Wear safety glasses and gloves, and keep metal tools and jewelry away from the battery posts.
3
Remove the cover and disconnect the battery
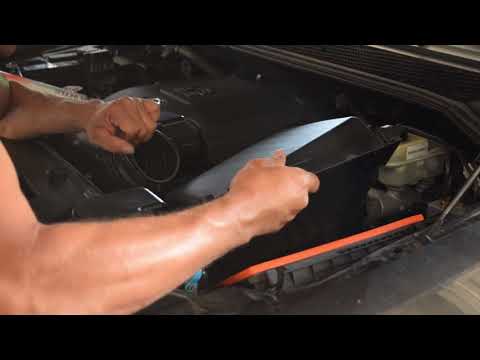
Locate the battery in the engine bay and unclip or unscrew the black plastic cover that sits over it, setting the fasteners aside where they will not get lost. Loosen the nut on the negative (-) cable clamp with a 10mm wrench, twist the cable off the post, and place it away from any metal surfaces. Do the same for the positive (+) cable. Remove the bolts or nuts holding the battery cover plate and hold-down, then lift the old battery straight out of the engine bay. Keep it upright and avoid letting the posts touch any metal as you carry it.
🔧 Mechanic's note — Ray Delgado
Quick word from me — I've been under there: Keep it upright and avoid letting the posts touch any metal as you carry it.
4
Install the new battery and replace the cover
Set the new Group 24F battery into the tray with the terminals facing the same direction as the old one, and clean any corrosion from the cable clamps and posts with a wire brush before reconnecting. Reinstall the hold-down and cover plate and snug its fasteners. Reconnect the positive (+) cable first, then the negative (-), tightening each clamp until the cable cannot twist on the post. Refit the black plastic battery cover. A light coating of terminal grease helps prevent future corrosion in this hot engine bay.
5
Start up and verify the charging system
Start the Armada and confirm there are no warning lights. If you have a multimeter, expect about 12.6 volts with the engine off and 13.5 to 14.8 volts while running, confirming the alternator charges the new battery. Stop and recheck your work if the battery feels hot, smells of sulfur, or the charging warning stays on. Recycle the old battery at a parts store for the core refund.
🔧 Mechanic's note — Tom Becker
I've seen this exact mistake come through the shop: Stop and recheck your work if the battery feels hot, smells of sulfur, or the charging warning stays on.
All Done!
Test your repair before closing everything up. If something doesn't work right, double-check your steps.
⚠️ Common Mistakes to Avoid
- • Buying by appearance instead of group size, CCA, polarity, and hold-down fit
- • Shorting the positive terminal to the body with a metal tool
- • Lifting the battery by damaged terminals or leaving it unsecured
- • Skipping battery registration, window/clock resets, or charging-system checks when required
- • Assuming a new battery fixes a parasitic draw or charging fault