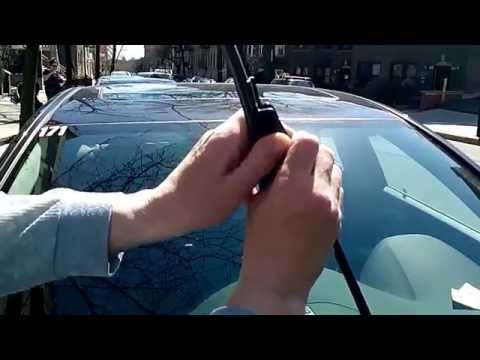
Quick answer: Wiper Blade Replacement on a 2005–2012 Acura RL is rated Easy and takes about 10–15 minutes. You'll need 1 tool for this job, and parts cost about $66. This guide walks you through the full job step by step, including the mistakes to avoid.
| Part Name |
Part Number |
Price |
Buy |
| Driver wiper blade, 28" |
Bosch 28A |
$32.99 |
|
| Passenger wiper blade, 19" |
Bosch 19B |
$32.99 |
|
About prices: shown prices are typical retail averages and change frequently; cheaper alternatives may be available. Confirm the current price before buying.
💡 Pro tip: Order all parts at once to save on shipping
Step-by-Step Instructions
Follow these steps carefully
1
Measure the driver's blade — catalogs disagree on this car
Lay a tape measure on your old driver blade and buy that length — a blade two inches off will either overrun the A-pillar or leave a blind crescent. The arms are conventional J-hook type.
2
Set the winter/service position, driver's side first
Lift the driver's arm first, then the passenger arm. The RL's arms park low beneath the hood's trailing edge, so do not haul them up.
🔧 Mechanic's note — Ray Delgado
I keep one hand on the wiper arm the whole time. A bare arm snapping back can crack the windshield — I've watched it happen.
3
Remove the driver's blade (or its rubber insert)
With the driver's arm upright, rotate the blade ninety degrees to sit crosswise to the arm. Find the release tab on the blade's J-hook connector, press it, and slide the blade downward off the hook. If you are replacing just the rubber insert rather than the whole blade, pull the insert out by its tabbed locking end and — if the new insert has no metal reinforcement strips — transfer the old strips into the new insert's edge slots, ends bowing away from the windshield on the driver's side. Lay your towel on the glass before the arm is ever bare.
4
Fit the new driver's blade or insert
Thread the new driver's blade onto the J-hook and slide it up until the tab clicks home, or seat the new insert fully into the blade holder until its tabs engage. Sight down the blade to confirm it sits straight along the arm with no twist — a crooked blade chatters immediately. Tug-test the connection firmly, then lower the arm back onto the windshield under full hand control, never letting the spring snap it down.
5
Swap the 19-inch passenger-side blade
Repeat the procedure on the passenger side with the 19-inch blade — insert or full blade, whichever you chose for the driver. Confirm the click, tug-test, and lower the arm gently. Do not open the hood at any point while either arm is raised.
6
Clean the glass and inspect the cowl and linkage area
The RL has no rear wiper, so spend this step on the area the blades live in. Check that both arms sit at equal height and that neither blade's rubber edge is nicked from the packaging.
7
Test at both speeds and set a replacement rhythm
Watch for silent, complete wipes with no skipped bands — if a blade slips or stutters, switch the wipers off and reseat it. Lower both arms fully onto the glass, start the car, and run the washers through several sweeps at low and high speed.
All Done!
Test your repair before closing everything up. If something doesn't work right, double-check your steps.
⚠️ Common Mistakes to Avoid
- • Opening the hood while a wiper arm is raised — the factory procedure explicitly forbids it, because the arm can catch the hood edge and bend.
- • Buying a 24-inch driver blade because a generic chart said so, when your car actually wears the 700mm (~28-inch) original — or vice versa. Measure the old driver blade; the catalogs genuinely disagree on this car.
- • Grabbing a rubber refill insert from its sides. Acura's own service guidance warns the metal rails can come loose and cut you — grip the tabbed locking end from top and bottom instead.