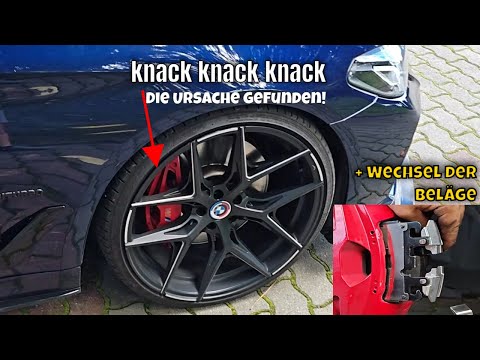
Quick answer: Front Brake Pad Replacement on a 2016–2021 BMW M2 is rated Moderate and takes about 60–90 minutes. You'll need 7 tools for this job, and parts cost about $263. This guide walks you through the full job step by step, including the mistakes to avoid.
| Part Name |
Part Number |
Price |
Buy |
| Front brake pad set (F87 M2 / M2 Competition) |
— |
$246.00 |
|
| Front brake pad wear sensor |
— |
$17.00 |
|
About prices: shown prices are typical retail averages and change frequently; cheaper alternatives may be available. Confirm the current price before buying.
💡 Pro tip: Order all parts at once to save on shipping
Step-by-Step Instructions
Follow these steps carefully
1
Park, chock, and loosen the lug bolts
Park the M2 on flat, level ground, engage the parking brake, and chock both rear wheels. While the car is still on the ground, break the five 17mm front lug bolts loose about half a turn with a breaker bar.
2
Lift the front onto jack stands
Position a floor jack under the front subframe jack point and raise the car until the front tire clears the ground. Set jack stands under the reinforced side jack pads behind the front wheels, then lower the car onto the stands. Give the car a firm shake to confirm it is stable before reaching underneath.
3
Remove the front wheel
Remove the five lug bolts completely and pull the front wheel off the hub. Lay the wheel flat under the rocker panel as a backup safety block.
4
Disconnect the pad wear sensor
The F87 carries its brake pad wear sensor on the left front inner pad. Trace the thin sensor wire from the pad up to its connector near the wheel well and unplug it carefully.
5
Note the pad retaining pins and clip
The F87's fixed calipers retain the pads with two steel pins and a spring clip across the top of the caliper. Save the pins and clip for reuse unless they are corroded or bent.
6
Slide out the old pads and retract the pistons
Slide the worn pads out of the caliper body, noting which pad carried the wear sensor. Open the brake fluid reservoir cap under the hood, then press the caliper pistons back evenly using a piston compressor tool or a large C-clamp against an old pad. Keep an eye on the reservoir so displaced fluid does not overflow.
7
Clean and inspect the caliper and rotor
Scrub the pad contact lands inside the caliper with a wire brush and brake cleaner until they are free of dust and rust. Inspect the rotor for scoring and cracks, and check its thickness against the minimum value stamped on the rotor hat. Replace the rotor now if it is below minimum or deeply grooved.
🔧 Mechanic's note — Ray Delgado
I've seen this exact mistake come through the shop: Inspect the rotor for scoring and cracks, and check its thickness against the minimum value stamped on the rotor hat.
8
Install the new pads and wear sensor
Apply a thin film of high-temp brake grease to the pad backing plates where they touch the caliper, keeping all grease off the friction faces. Slide the new pads into the caliper with the friction material facing the rotor, and clip the new wear sensor into the left front inner pad. Route the sensor wire through its clips and reconnect the plug.
9
Reinstall the pins, clip, and wheel
Drive the retaining pins back through the caliper ears and pads, then refit the anti-rattle spring clip over them. Double-check that the sensor wire is clear of the wheel.
10
Pump the pedal and bed in the pads
With the engine off, pump the brake pedal several times until it feels firm and high. Check the brake fluid reservoir level and top up with the correct DOT fluid if it is low. Bed the new pads with several moderate stops from about 40 mph down to 10 mph with cool-down time between runs, and avoid hard stops for the first 200 miles.
🔧 Mechanic's note — Tom Becker
Small thing, big difference: I bed with moderate 40-to-10 stops and cooling time between — I've ruined a bed-in with hard stops in the first 200 miles.
All Done!
Test your repair before closing everything up. If something doesn't work right, double-check your steps.
⚠️ Common Mistakes to Avoid
- • Driving the car before pumping the brake pedal back up. The pistons are fully retracted after the job, so the first pedal press goes to the floor. Always pump until firm before moving.
- • Reusing a triggered pad wear sensor. Once the sensor's wire loop is worn through, the dash warning cannot reset. Fit the new sensor that comes with the pad set.
- • Getting brake grease on the pad friction material or rotor face. Grease belongs only on backing plates and contact points. Contaminated friction surfaces squeal and fade.
- • Skipping the reservoir check after pushing the pistons back. Displaced fluid can overflow onto paint or leave the level wrong. Wipe spills immediately and set the level correctly.