Quick answer: AC Not Blowing Cold / Recharge on a 2016–2024 Chevrolet Camaro is rated Moderate and takes about 30-60 minutes. You'll need 2 tools for this job, and parts cost about $45. This guide walks you through the full job step by step, including the mistakes to avoid.
| Part Name |
Part Number |
Price |
Buy |
| Correct refrigerant DIY kit with gauge (R-134a or R-1234yf as labeled) |
— |
$45.00 |
|
| AC leak-detect dye (optional) Optional |
— |
$12.00 |
|
About prices: shown prices are typical retail averages and change frequently; cheaper alternatives may be available. Confirm the current price before buying.
💡 Pro tip: Order all parts at once to save on shipping
Step-by-Step Instructions
Follow these steps carefully
1
Confirm refrigerant type and symptoms
Find the under-hood A/C specification (J639) sticker on the 2016-2024 Chevrolet Camaro — usually on the radiator support or under the hood — and confirm the refrigerant type before buying anything. 2016 Camaros use R-134a; 2017+ use R-1234yf (GM bulletin 12-01-37-001B and GM's March 2016 TechLink notice both list the Camaro in the 2017 yf rollout). This guide spans the changeover, so your car's under-hood J639 label is the final word. Capacity reference: about 24–32 oz (680–900 g). A general chart lists roughly 24–32 oz for the Camaro family (wide range) — charge to the exact weight on your car's label. Confirm the symptoms fit low charge: warm vents on MAX A/C with recirculate, but strong cabin airflow. Sixth-gen engine bays are tight — you may need to remove the engine cover to see the lines. On 2017+ cars, R-1234yf is mildly flammable (A2L): work in a ventilated area with yf-rated cans and oil. Wear safety glasses and gloves — refrigerant can cause frostbite and serious eye injury. Never vent refrigerant to the atmosphere, and never overcharge.
🔧 Mechanic's note — Tom Becker
The mistake I see most on 2017-and-up Camaros: grabbing a cheap R-134a can for an R-1234yf car. The fittings are different sizes on purpose — if the coupler won't slide on easily, stop. You're on the wrong port or using the wrong refrigerant.
2
Find the low-side service port
Trace the larger-diameter aluminum suction line from the compressor; its service port is the smaller quick-connect fitting. On R-1234yf cars it's 14 mm OD (EPA) — the coupler fits ONLY the low side. Never force an adapter onto the high-side fitting. Wipe the port clean.
3
Take a baseline reading
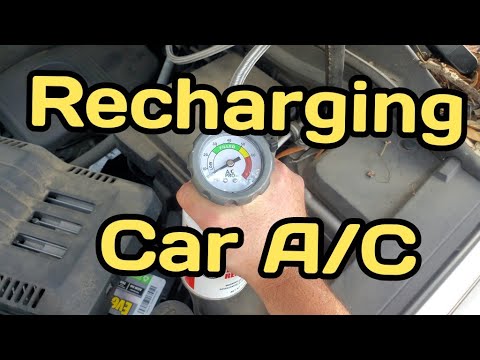
MAX A/C, recirculate, blower high; confirm clutch engagement, wait a minute, then gauge the low side. 80°F → 40–50 psi (R-134a) or 25–35 (R-1234yf); 90°F → 45–55 vs 30–40. Near zero or deep red = system essentially empty; find the leak before adding anything.
🔧 Mechanic's note — Ray Delgado
I tell every DIYer this: Short-cycling usually means the charge is way low or there's a restriction — on a Camaro with 24 to 32 ounces total capacity, there's not much margin for guessing.
4
Add refrigerant cautiously
Short bursts, can upright, pausing between bursts. Stop in range, center vent cold (high 30s–mid-40s °F). Match the label — refrigerants aren't interchangeable, different oils and fittings. R-1234yf is mildly flammable (A2L): ventilated area, yf-rated cans. Never overcharge — compressor damage risk.
5
Stop and verify cooling
Stop, disconnect. Hunt leaks: oily residue at fittings and condenser face; UV reveals dye. Cooling fades in days or weeks? Fix the leak first — R-1234yf needs shop recovery. See a pro if the compressor never engages, pressures won't rise, or the system was empty.
All Done!
Test your repair before closing everything up. If something doesn't work right, double-check your steps.
⚠️ Common Mistakes to Avoid
- • Using the wrong refrigerant (R-134a vs R-1234yf)
- • Overcharging by watching a gauge without following the kit chart and vent temperature
- • Recharging an empty or badly leaking system
- • Connecting to the high-side port
- • Continuing to recharge when the system loses cooling again within days