Quick answer: Engine Air Filter Replacement on a 1999–2004 Chevrolet Tracker is rated Easy and takes about 10 minutes. No tools are required for this job, and parts cost about $35. This guide walks you through the full job step by step, including the mistakes to avoid.
| Part Name |
Part Number |
Price |
Buy |
| Engine air filter for 1999-2004 Chevrolet Tracker; verify engine, housing shape, and VIN fitment |
— |
$35.00 |
|
About prices: shown prices are typical retail averages and change frequently; cheaper alternatives may be available. Confirm the current price before buying.
💡 Pro tip: Order all parts at once to save on shipping
Step-by-Step Instructions
Follow these steps carefully
1
Find the air cleaner on the passenger's side
The owner's manual places it precisely. Park on level ground, switch the engine off, let it cool, and wipe the top of the box so grit can't fall in.
2
Release the quick-release clips
The lid is held by quick-release clips around its edge — no tools needed. Flip each clip outward with your fingers. Early in this generation the box is a squarer two-piece unit sitting high on the right fender.
3
Lift the lid and pull the old filter
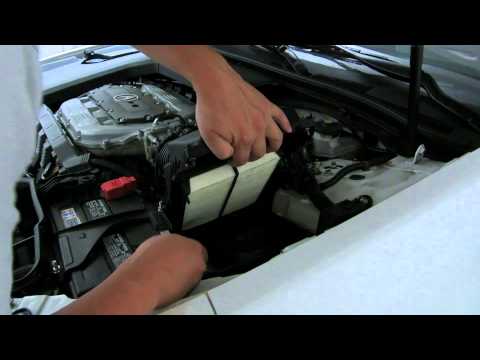
Lift the lid straight up and set it aside, keeping it clear of the intake snorkel so you don't stress the duct. Pull the old panel filter out and note its orientation. Which side faced up and how the gasket sat.
4
Clean the box and check the snorkel and resonator
Vacuum or wipe the lower box to remove dust, leaves, and grit. Follow the intake snorkel forward and check it and the resonator chamber. The bulbous section that quiets intake noise. Make sure those channels aren't packed with mud.
🔧 Mechanic's note — Tom Becker
I check the resonator chamber and those molded ribs on the later round box — mouse nesting and mud-packed water channels are the Tracker-specific gotchas hiding in this step.
5
Seat the new filter fully
Set the new filter in flat and square, gasket even all around. Press each corner gently and look for gaps — an unseated filter lets dirty air bypass it straight into the engine. It only fits one way; if it rocks, it's upside down.
6
Refit the lid and latch every clip
Lower the lid back on squarely and flip every quick-release clip closed. Each clip should snap with the same positive feel. Run your finger around the joint to confirm it's even before you call it done.
🔧 Mechanic's note — Ray Delgado
Here's what I do: a clip that won't latch means the lid is sitting on the filter edge, not square on the box. Don't force the clip — lift the lid and reseat it, then run your finger around the joint.
7
Verify and note the interval
Start the engine and let it idle. Listen at the airbox for a whistle or hiss — a missed clip — and confirm a smooth idle with no check-engine light. Replace roughly every 30,000 miles under normal use, sooner if you drive dusty back roads.
All Done!
Test your repair before closing everything up. If something doesn't work right, double-check your steps.
⚠️ Common Mistakes to Avoid
- • Forcing a clip instead of reseating the lid — a clip that won't latch means the lid is crooked.
- • Stress-cracking the intake snorkel by dragging the lid sideways.
- • Installing the filter upside down so it rocks instead of sitting flat.
- • Never checking the resonator and snorkel for cracks or nesting material.