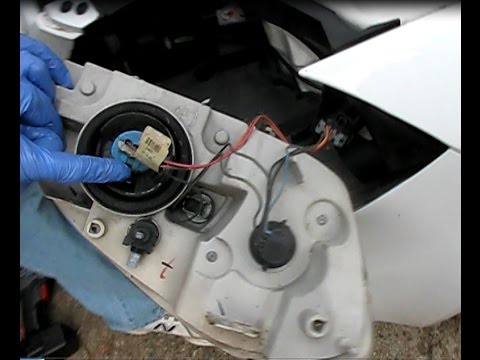
Quick answer: Headlight Bulb Replacement on a 2006–2011 Honda Civic is rated Easy and takes about 20–40 minutes. You'll need 4 tools for this job, and parts cost about $15. This guide walks you through the full job step by step, including the mistakes to avoid.
| Part Name |
Part Number |
Price |
Buy |
| H7 Halogen Headlight Bulb |
H7-12V-55W |
$15.00 |
|
| H1 Halogen Headlight Bulb Optional |
H1-12V-55W |
$12.00 |
|
About prices: shown prices are typical retail averages and change frequently; cheaper alternatives may be available. Confirm the current price before buying.
💡 Pro tip: Order all parts at once to save on shipping
Step-by-Step Instructions
Follow these steps carefully
1
Pick your access path before you start
The eighth-generation Civic (2006–2011) gives you two ways at the low-beam bulb, and the smart move is choosing per side. The alternative is turning the front wheels and reaching up from the wheel well.
2
Clear the passenger side: swing the washer neck aside
On the passenger side, the gooseneck of the windshield washer reservoir sits right in front of the headlight's rear opening. If the clip is brittle, work it gently; breaking it means the neck flops around afterward.
🔧 Mechanic's note — Tom Becker
I work that washer-neck clip gently — if it's brittle and snaps, I've learned the neck flops around forever, and the rattle drives owners crazy.
3
Clear the driver's side: shift the coolant tank
Unbolt it or lift it off its bracket and ease it aside just enough to get your hand behind the headlight — again, no hoses need to come off.
4
Unplug the wiring connector
Press firmly on the release tab — on this Civic it is the bottom of the connector's center cut-out — and pull the plug straight off while holding the tab down. Pull on the plug body, never the wires.
5
Twist the old bulb out
Grip the back of the bulb by its base and rotate it counterclockwise to the unlocked position, then pull it straight out toward you.
6
Install the new bulb without touching the glass
Skin oil on the glass becomes a hot spot that shortens the bulb's life or can even blister it — if you touch the glass, clean it with rubbing alcohol before installing.
7
Put everything back and test
Close the hood, turn the headlights on, and check the low beam — plus the high beam on that side while you are at it.
🔧 Mechanic's note — Ray Delgado
I check the low beam and the high beam on that side — I've closed up after checking just the low beam and missed a dead high beam.
All Done!
Test your repair before closing everything up. If something doesn't work right, double-check your steps.
⚠️ Common Mistakes to Avoid
- • Breaking the washer-neck clip by prying instead of popping it properly
- • Seating the bulb a tab off so the beam pattern comes out lopsided
- • Forcing the driver's side without moving the coolant tank and skinning your knuckles