Quick answer: Front Brake Pad and Rotor Replacement on a 2002–2006 Honda CR-V is rated Advanced and takes about 1-2 hours. You'll need 10 tools for this job, and parts cost about $169. This guide walks you through the full job step by step, including the mistakes to avoid.
| Part Name |
Part Number |
Price |
Buy |
| Front brake pad set (D914) |
— |
$39.00 |
|
| Front brake rotors, 282mm (pair) |
— |
$87.00 |
|
| Brake parts cleaner |
— |
$9.00 |
|
| High-temp brake grease |
— |
$15.00 |
|
| Copper anti-seize |
— |
$19.00 |
|
About prices: shown prices are typical retail averages and change frequently; cheaper alternatives may be available. Confirm the current price before buying.
💡 Pro tip: Order all parts at once to save on shipping
Step-by-Step Instructions
Follow these steps carefully
1
Lift the vehicle and remove wheels
Park your 2002-2006 Honda CR-V on a level surface, engage the parking brake, and loosen the front lug nuts slightly while the wheels are on the ground. Gather front brake pads (D914), 282mm rotors, brake cleaner, high-temp grease, and tools including 14mm, 17mm, and 19mm sockets. Jack up the front and secure on jack stands, then remove both front wheels.
2
Remove the brake caliper
Locate the front brake caliper. Remove the two 14mm caliper slide bolts on the back of the caliper. Carefully slide the caliper off the rotor and support it with a bungee cord or wire hung from the suspension. Do not let the caliper hang by the rubber brake hose, as this can damage the hose internally.
🔧 Mechanic's note — Tom Becker
My shop habit: Do not let the caliper hang by the rubber brake hose, as this can damage the hose internally.
3
Remove old brake pads
Slide the old brake pads out of the caliper bracket. Note the position of any shims, clips, or wear indicators. Inspect the caliper slide pins for corrosion and ensure they move freely; clean and re-grease if necessary.
4
Remove the caliper bracket and rotor
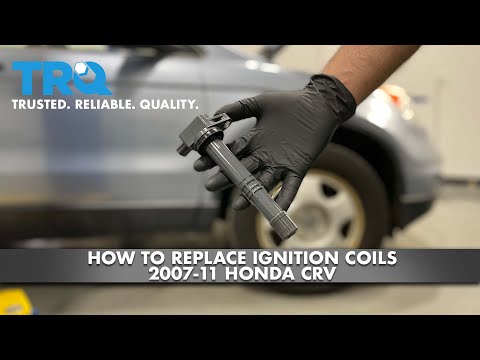
Remove the two 17mm caliper bracket bolts and lift the bracket off. The brake rotor is held by two Phillips-head screws that often seize. Use an impact screwdriver with a Phillips bit to break them loose, as shown in the TRQ video. Once removed, slide the rotor off the hub. If rusted on, tap gently with a hammer.
🔧 Mechanic's note — Ray Delgado
This is the part I see people get wrong: the rotor is held by two Phillips-head screws that seize, so I break them loose with an impact screwdriver.
5
Install the new brake rotor
Clean the wheel hub surface with a wire brush to remove rust and ensure the new rotor sits flat. Apply a thin coat of copper anti-seize to the hub face (not the braking surface). Slide the new 282mm rotor onto the hub and secure with the rotor screws. Reinstall the caliper bracket and torque the 17mm bolts to 80 ft-lbs.
🔧 Mechanic's note — Ray Delgado
Don't learn this the expensive way like I did: I apply a thin coat of copper anti-seize to the hub face — never the braking surface.
6
Compress the caliper piston
Use a brake caliper compressor tool (screw-type for single piston) to push the caliper piston back into its bore. Open the brake fluid reservoir cap under the hood first to allow fluid to return. Compress slowly and evenly. Check that the reservoir does not overflow.
7
Install new brake pads
Apply high-temp brake grease to the pad backing plates where they contact the caliper and bracket (not the friction surface). Install the new pads into the bracket with any included shims and hardware.
8
Reinstall the caliper
Carefully lower the caliper over the new pads and rotor. Reinstall the two 14mm caliper slide bolts and torque to 27 ft-lbs. Verify the caliper moves smoothly on the slide pins.
9
Torque wheels and bed the brakes
Lower the vehicle to the ground and torque the lug nuts to 80 ft-lbs in a star pattern. Before driving, pump the brake pedal firmly 5-10 times until it feels solid; this seats the pads against the rotors. Check the brake fluid level and top off if needed. Test at low speed, then bed the brakes with several moderate stops from 30 mph.
All Done!
Test your repair before closing everything up. If something doesn't work right, double-check your steps.
⚠️ Common Mistakes to Avoid
- • Not using an impact screwdriver on the rotor screws, leading to stripped heads that are very difficult to remove.
- • Forgetting to pump the brake pedal before driving, resulting in no brakes on the first stop.
- • Installing the pads without brake grease on the contact points, causing squealing and premature wear.
- • Compressing the caliper piston without opening the brake fluid reservoir cap, which can damage seals from pressure buildup.