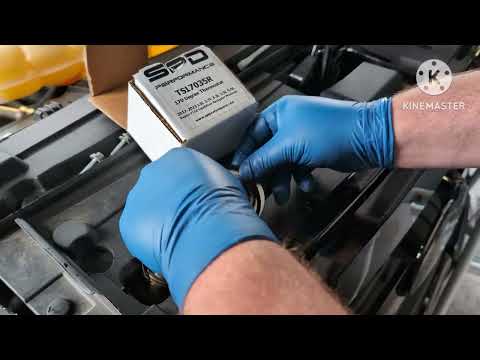
Quick answer: Thermostat Replacement on a 2011–2016 Hyundai Elantra is rated Moderate and takes about 1-2 hours. You'll need 5 tools for this job, and parts cost about $50. This guide walks you through the full job step by step, including the mistakes to avoid.
| Part Name |
Part Number |
Price |
Buy |
| Thermostat |
25500-2E000 |
$25.00 |
|
| Thermostat Gasket |
25321-2E000 |
$10.00 |
|
| Coolant |
071000-2P000 |
$15.00 |
|
About prices: shown prices are typical retail averages and change frequently; cheaper alternatives may be available. Confirm the current price before buying.
💡 Pro tip: Order all parts at once to save on shipping
Step-by-Step Instructions
Follow these steps carefully
1
Prepare (conventional 192°F stat!)
The 2011–2016 Hyundai Elantra (1.8L Nu) thermostat replacement: CONVENTIONAL wax-pellet thermostat — NOT electronic. OE: Hyundai 25500-2E000. Opening temp 192°F (89°C). You'll need: new conventional thermostat (25500-2E000), green phosphate-based EG coolant (Asian formula), basic sockets, drain pan. This is the OLD-style job — upper-radiator-hose gooseneck, jiggle pin toward the top. Note: this is DIFFERENT from the 2017-2020 Elantra's electronic 212°F stat — don't use the newer procedure. Cost: ~$15-30 for the conventional stat (vs $200+ for the electronic). Simple, cheap, classic.
🔧 Mechanic's note — Ray Delgado
I always keep one drain pan for coolant and a separate one for oil. Mixing the two in the same pan makes both of them unrecyclable.
2
Drain, Access the Gooseneck
Drain the coolant via the radiator petcock. No undercover gymnastics, no electronic connector. The 192°F (89°C) opening is the standard wax-pellet temp. This is the simple version of the Elantra thermostat job.
3
Remove Old Stat (note jiggle pin!)
Remove the gooseneck housing bolts. Remove the old conventional thermostat. Note the jiggle pin orientation — the new stat's jiggle pin goes toward the TOP (12 o'clock) for proper air bleeding. Clean the mating surfaces. OE is 25500-2E000 (Gates OE-type equivalent).
4
Install New 192°F Stat
Install the new 192°F thermostat with the jiggle pin toward the TOP. Use a new gasket/O-ring. Torque the housing bolts to spec (service data — exact torque wasn't verified; the aluminum housing needs a light torque, don't over-tighten).
🔧 Mechanic's note — Ray Delgado
I install the new 192°F thermostat in the Elantra — and if the heater blows cold after, I know that is trapped air talking. I bleed it again before I blame the part, because I have blamed a good thermostat before.
5
Refill Green Coolant, Bleed
Refill with green phosphate-based EG coolant (Asian formula). The 1.8L Nu uses the same green coolant as the newer Elantra — but the thermostat is completely different. Fill the radiator and reservoir. Bleed: the jiggle pin helps, but still run to operating temp with heat on max, let the 192°F stat open, cool, recheck. The 192°F opening is lower than the 2017+ electronic's 212°F — don't expect the same gauge reading.
🔧 Mechanic's note — Ray Delgado
I refill the Elantra with green coolant and bleed — I check that the color matches what was in there. I have seen the wrong coolant turn to gel in a heater core, and if the color does not match, I flush it completely.
6
Verify, Recheck Level
Start the engine — check for leaks at the gooseneck. The gauge should climb to normal (192°F stat). Confirm the upper hose gets hot. The CONVENTIONAL 192°F wax-pellet stat (not electronic), the 25500-2E000 OE number, jiggle-pin-up orientation, and green phosphate coolant are the 2011-2016 Elantra 1.8L's defining specs. This is the cheap, simple thermostat job — $15-30 part, basic tools. Don't confuse it with the 2017-2020's $200+ electronic unit.
All Done!
Test your repair before closing everything up. If something doesn't work right, double-check your steps.
⚠️ Common Mistakes to Avoid
- • Not properly draining the coolant before starting the repair
- • Failing to replace the thermostat gasket, leading to leaks
- • Over-tightening the thermostat housing bolts, causing damage