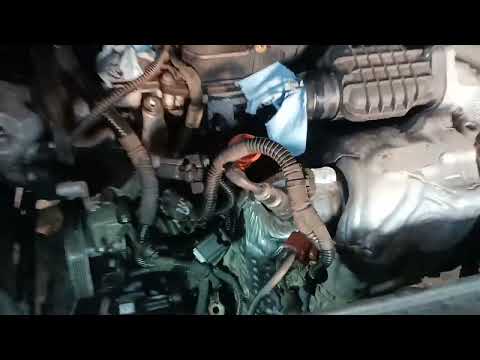
Quick answer: Alternator Replacement on a 2016–2021 Hyundai Tucson is rated Moderate and takes about 1-2 hours. You'll need 9 tools for this job, and parts cost about $406. This guide walks you through the full job step by step, including the mistakes to avoid.
| Part Name |
Part Number |
Price |
Buy |
| Alternator, new or remanufactured, 150A (2.0L/2.4L; core charge may apply on reman units) |
— |
$360.00 |
|
| Serpentine drive belt (replace while the belt is off; 2.4L has a separate small water-pump belt that stays in place) |
— |
$46.00 |
|
About prices: shown prices are typical retail averages and change frequently; cheaper alternatives may be available. Confirm the current price before buying.
💡 Pro tip: Order all parts at once to save on shipping
Step-by-Step Instructions
Follow these steps carefully
1
Park and prepare
Park on level ground, set the parking brake, and let the engine cool. Write down your radio presets and other saved settings; they reset when the battery is disconnected.
2
Disconnect the battery (negative first)
Disconnect the negative (-) battery terminal first. Hyundai's owner's-manual rule is negative cable removed first and installed last. Clean the terminal with a wire brush while you are there.
3
Remove the engine cover and under cover
Pull off the plastic engine cover. Remove the engine-room under cover, or splash shield (several clips and bolts), for access and to see the belt routing.
4
Photograph the belt routing
Sketch or photograph the serpentine belt routing before touching it. On the 2.4L there is a separate small water-pump belt in addition to the main drive belt; for the alternator job you only remove the main drive belt.
5
Release the belt tensioner
Put a wrench on the belt tensioner arm boss and rotate it clockwise to slacken the belt, then lock it with a fixing pin per the Hyundai service procedure. Slip the drive belt off the alternator pulley.
6
Disconnect the alternator wiring
Disconnect the alternator electrical connector (press the latch tab and pull). Remove the nut on the B+ terminal and lift the main cable off. The B+ cable is always hot, so keep it away from ground and tools.
🔧 Mechanic's note — Ray Delgado
I've watched guys short that B+ cable against the block because they set it down carelessly — I fold a shop rag over the terminal and tuck it where it can't swing into anything while I work the bolts.
7
Remove the alternator bolts and lift it out
Remove the alternator upper and lower mounting bolts and lift the alternator out of the engine bay.
8
Compare the old and new units
Compare the old and new units side by side: mounting ears, pulley groove count, connector style, and amperage. US Tucsons of this generation use 150A alternators; 120A and 130A units built for other Hyundai applications do not belong here.
🔧 Mechanic's note — Ray Delgado
I hold the old and new alternators up side by side on the counter before I bolt anything in — the 120A and 130A units look almost identical to the 150A this Tucson needs, and catching the wrong one now saves an hour of rework.
9
Install the new alternator
Seat the alternator in the bracket, start all mounting bolts by hand, then tighten them evenly to firm resistance. Hyundai does not publish torque specs for the Tucson alternator mounting bolts, so do not use excessive force.
🔧 Mechanic's note — Ray Delgado
I run the bolts in by hand first and tighten them evenly, a little at a time — with no published torque spec, feel is all you've got, and heavy force can crack a mounting ear.
10
Reconnect the wiring
Reconnect the B+ cable and snug the nut, then plug in the electrical connector until the latch clicks.
11
Reinstall the drive belt
Re-route the serpentine belt per the routing diagram, remove the fixing pin so the automatic tensioner takes up slack, and verify the belt sits centered in every pulley groove.
12
Reinstall the covers and reconnect the battery
Reinstall the under cover and engine cover. Reconnect the negative (-) battery terminal LAST.
13
Start the engine and verify charging
Start the engine and verify charging: 13.5 to 14.8 V at the battery terminals with the engine running. Watch that the belt tracks straight in every pulley groove.
14
Recheck after a short drive
After a short drive, recheck charging voltage and confirm that no battery or charging warning lights come on. Return the core on a reman unit for your deposit.
All Done!
Test your repair before closing everything up. If something doesn't work right, double-check your steps.
⚠️ Common Mistakes to Avoid
- • Skipping the battery disconnect and shorting the hot B+ terminal against the engine or body, which can fry modules and blow the main fuse.
- • Reusing a worn serpentine belt instead of replacing it while it is already off.
- • Installing the new alternator onto a dead or drained battery. The alternator maintains charge, it is not a battery charger; a drained battery can overwork and kill a new alternator.
- • Buying the wrong amperage (120A and 130A units exist for other Hyundai applications) or a unit with a mismatched connector or pulley. Always compare the old and new units side by side.
- • Routing the belt wrong or leaving it one groove off on a pulley. Photograph the routing before removal.
- • Forgetting to verify charging voltage after installation (13.5 to 14.8 V at the battery with the engine running).
- • Overtightening the B+ terminal nut or under-tightening the mounting bolts. Torque specs are not published by Hyundai for this model, so tighten evenly to firm resistance.