Quick answer: Wiper Blade Replacement on a 2008–2013 Infiniti G37 is rated Easy and takes about 10–15 minutes. You'll need 1 tool for this job, and parts cost about $66. This guide walks you through the full job step by step, including the mistakes to avoid.
| Part Name |
Part Number |
Price |
Buy |
| Driver wiper blade, 26" |
Bosch 26A |
$32.99 |
|
| Passenger wiper blade, 16" |
Bosch 16B |
$32.99 |
|
About prices: shown prices are typical retail averages and change frequently; cheaper alternatives may be available. Confirm the current price before buying.
💡 Pro tip: Order all parts at once to save on shipping
Step-by-Step Instructions
Follow these steps carefully
1
Buy the 26-inch driver blade and measure the passenger side
Measure your old passenger blade before buying, because a one-inch error is immediately obvious as an unwiped strip. There is no rear wiper on any G37 body style, so you only need the front pair.
2
Switch auto-wipe off and lift the arms directly
The G37 needs no service position — the arms park where you can reach them and lift straight up. Then lift the driver's arm away from the windshield until the spring holds it upright, and lay your towel on the glass beneath it.
🔧 Mechanic's note — Tom Becker
I replace wipers in pairs, always. A new blade next to a worn one just smears differently. I make sure the arms aren't bent. Bent arms cause uneven pressure and streaking.
3
Press the tab and slide the driver's blade off the hook
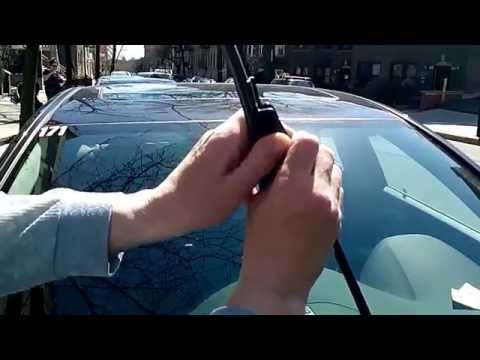
Press the tab in and slide the blade downward, off the arm's J-hook. Keep the tab held in its released position while you slide — the most common struggle here is pressing the tab halfway and wondering why the blade will not budge.
4
Click the new driver's blade onto the hook
Take the new 26-inch blade and slide its connector straight up onto the J-hook until you hear and feel the click of the tab engaging. The blade should sit centered and straight on the arm; if it looks angled or offset, it is not latched. Give it a firm downward tug to verify the lock — a blade that is not fully seated can walk off the hook at highway speed. Lower the arm back onto the windshield slowly, guiding it by hand all the way down.
5
Swap the passenger-side blade
Repeat the tab-and-slide procedure on the passenger side with the blade length you measured (16 or 17 inches). Confirm the click, tug-test the blade, and lower the arm gently back to the glass.
6
Clean the glass and inspect the cowl while the arms are up
Clean the full windshield with glass cleaner, and clear leaves and grit from the cowl panel at the base of the glass — debris here packs around the wiper linkage and the rain sensor's wiring.
7
Test with the washers and set a replacement interval
Lower both arms fully onto the glass, start the car, and run the washers through several complete sweeps. If the rain-sensing system is equipped, a quick AUTO-mode check in the next rain will confirm the sensor still reads clearly through the freshly cleaned glass.
All Done!
Test your repair before closing everything up. If something doesn't work right, double-check your steps.
⚠️ Common Mistakes to Avoid
- • Leaving the rain-sensing auto-wipe armed while you work. A splash of water or a passing shadow can trigger a sweep with your fingers at the connector — switch the stalk fully OFF first.
- • Buying the passenger blade by memory: 2008–2009 cars and most coupes list a 17-inch passenger blade, while 2010–2013 listings show 16 inches. Measure yours rather than guessing.
- • Testing the new blades on a dry, dusty windshield. The fresh rubber edge needs a wet test — run the washers, not a dry sweep.