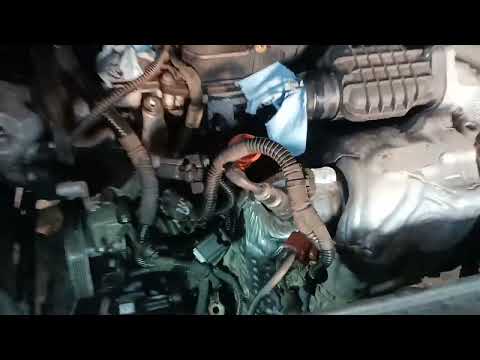
Quick answer: Alternator Replacement on a 2009–2013 Toyota Corolla is rated Moderate and takes about 1-2 hours. You'll need 5 tools for this job, and parts cost about $214. This guide walks you through the full job step by step, including the mistakes to avoid.
| Part Name |
Part Number |
Price |
Buy |
| Remanufactured Alternator (1.8L 2ZR-FE, 12V 100A, OE-style) |
104210-5491 |
$190.00 |
|
| Serpentine Drive Belt (inspect; replace if cracked or glazed) |
— |
$24.00 |
|
About prices: shown prices are typical retail averages and change frequently; cheaper alternatives may be available. Confirm the current price before buying.
💡 Pro tip: Order all parts at once to save on shipping
Step-by-Step Instructions
Follow these steps carefully
1
Disconnect the battery
Turn the ignition off and remove the key. Using a 10mm socket, loosen the negative (-) battery cable clamp and pull it off the terminal. Tuck it aside so it cannot touch the battery post while you work.
2
Note the belt routing
Locate the alternator at the front of the 1.8L 2ZR-FE engine. Take a clear photo of how the serpentine belt routes around every pulley, or sketch the routing on paper. You will need this to reinstall the belt correctly.
3
Release the serpentine belt
Place a 14mm socket on the belt tensioner and rotate it toward the passenger side (counter-clockwise) to unload the spring. Slip the belt off the alternator pulley while holding the tensioner. Release the tensioner slowly.
4
Disconnect the alternator wiring
Press the release tab and pry the alternator connector free with a flat-blade screwdriver — don't crack the plastic. Pull back the grey cover on the charging terminal, remove the 10mm nut, and lift the cable off.
5
Unbolt the alternator
Remove the two 14mm bolts that mount the alternator to the engine block. A breaker bar may help break them loose. Lay a folded rag over the exposed crank sensor wiring just below the alternator to protect it.
6
Lift out the old alternator
Slide the alternator toward you off its lower mount, ease it forward past the cooling hose, and lift it up and out of the engine bay without resting it on the crank sensor wires.
🔧 Mechanic's note — Ray Delgado
That folded rag over the crank sensor wiring isn't optional on this job. I've seen guys crack a sensor connector wrestling the alternator out — and then they're chasing a check-engine light on top of a charging problem.
7
Compare the replacement unit
Hold the new alternator next to the old one: mounting ears, pulley groove count, rear-housing clocking, and electrical connector must all match. For the 2009-2013 Corolla 1.8L the OE-spec unit is a 12V 100A alternator.
8
Install the new alternator
Lower the new alternator into place, seat it on the mounts, and install the two mounting bolts. No factory torque spec was found in the sources reviewed — tighten securely and consult a 2009-2013 Corolla manual for the exact figure.
9
Reconnect wiring and refit the belt
Reinstall the charging cable; tighten the 10mm nut, plug the connector in until it clicks. Rotate the tensioner with the 14mm socket; slip the belt onto the alternator pulley. Confirm it sits fully in every groove before releasing.
10
Reconnect the battery and test charging
Reconnect the battery cable and tighten the 10mm clamp. Start the engine and measure voltage at the battery terminals: a healthy charging system reads 13.8V to 14.7V. Confirm the battery warning light is off and listen for unusual noises.
All Done!
Test your repair before closing everything up. If something doesn't work right, double-check your steps.
⚠️ Common Mistakes to Avoid
- • Reinstalling the serpentine belt with the wrong routing. Photograph the routing before you touch anything.
- • Forcing the electrical connector off. The release tab is on the side and the plastic gets brittle; pry gently from below with a flat-blade screwdriver.
- • Skipping the belt inspection. A cracked or glazed belt belongs in the trash while it is already off.
- • Lifting the old alternator out over the exposed crank sensor wiring. Cover the wiring with a rag first.
- • Installing without comparing the new unit to the old one. Check pulley groove count, mounting ears, housing clocking, and the connector before bolting anything up.