Quick answer: Engine Air Filter Replacement on a 2009–2013 Toyota Corolla is rated Easy and takes about 5–10 minutes. No tools are required for this job, and parts cost about $20. This guide walks you through the full job step by step, including the mistakes to avoid.
| Part Name |
Part Number |
Price |
Buy |
| Engine air filter |
— |
$20.00 |
|
About prices: shown prices are typical retail averages and change frequently; cheaper alternatives may be available. Confirm the current price before buying.
💡 Pro tip: Order all parts at once to save on shipping
Step-by-Step Instructions
Follow these steps carefully
1
Find the airbox on the passenger side
Park on level ground, shut the engine off, and pop the hood. The air filter sits in a black plastic box in the front corner of the engine bay on the passenger side — follow the ribbed intake tube from the throttle body and it leads you right to it. This covers the 1.8L 2ZR-FE four-cylinder in every 2009–2013 Corolla. (The 2009–2010 XRS trim got a 2.4L 2AZ-FE instead; its box looks the same but takes a different element, so check your engine before buying a filter.) Let the bay cool for a few minutes if the engine just ran.
2
Flip the two silver clips outward
Wipe grit off the clips and seam first so dirt doesn't drop in. The intake tube stays attached to the lid; lift carefully without stressing it.
3
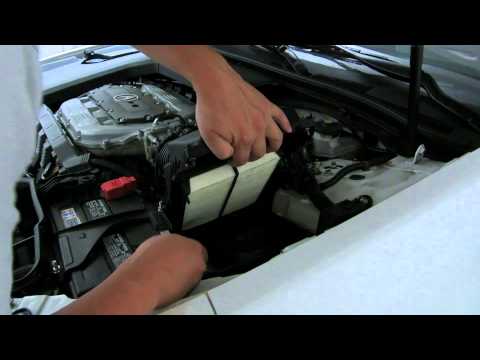
Lift the lid and pull the old filter
Lift the top half of the housing off and slide the old filter out, noting its orientation. The factory element's small indexing protrusions mate with reliefs molded into the lid — your orientation key, and some cheap aftermarket filters skip those tabs.
🔧 Mechanic's note — Tom Becker
Those little indexing tabs matter more than they look. Cheap filters that skip them can shift around and let dirty air sneak past — I'd spend a few dollars more for the one with tabs.
4
Clean the box and check the tube
Vacuum or wipe the lower box — grit collects in the corners. Inspect the lid's inside for cracks around the clip hooks; a cracked hook won't hold the seal. Clean grime from the gasket groove so the new seal sits flat.
5
Drop in the new filter
Set the new filter in with the old one's orientation, lining up the indexing protrusions with the reliefs in the lid's underside. Press it down gently and run a finger around the seal — any twist or gap becomes a dirt leak.
6
Set the lid and flip the clips back
Lower the lid straight down and flip both silver clips inward over their hooks until they snap flat — both should close with the same easy motion.
7
Start it up
Start the engine and idle — it should sound exactly as before; whistling or a sucking noise at the airbox means the lid isn't sealed. No warning lights should appear.
All Done!
Test your repair before closing everything up. If something doesn't work right, double-check your steps.
⚠️ Common Mistakes to Avoid
- • Prying a clip sideways instead of flipping it straight outward — the hooks snap off the lid and then it never seals right again.
- • Installing the filter upside down or rotated so the indexing tabs don't line up; the lid then sits crooked and the clips won't close evenly.
- • Dropping grit into the lower (clean) half of the box while the filter is out — that side goes straight to the throttle body.
- • Buying the XRS 2.4L element for a 1.8L car or vice versa; the boxes look alike but the filters differ, so match the filter to your engine.