← Back to Dodge Neon Guides

2000–2005 Dodge Neon

2000-2005 Dodge Neon — Spark Plug Replacement

🔧 Easy 30-60 minutes

Quick Video Tutorial

Parts You Need

Click links to purchase (we earn from qualifying purchases)

Total Cost
$0.00
Part Name Part Number Price Buy
4x spark plugs (2.0L SOHC Neon application) — —
Spark plug wire set (2.0L SOHC) — —
Dielectric grease packet — —

💡 Pro tip: Order all parts at once to save on shipping

Step-by-Step Instructions

Follow these steps carefully

1

Cool the engine and expose the plug wires

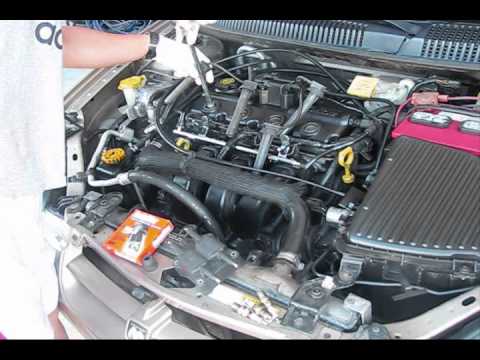
Make sure the 2000-2005 Neon's 2.0L SOHC engine is stone cold, then disconnect the negative battery terminal and set the cable aside. Remove the plastic engine cover if your Neon still has one, exposing the four spark plug wires running from the coil pack across the top of the valve cover. Take a photo of the wire routing so each wire returns to its correct cylinder.

2

Remove one plug wire at a time

Starting with cylinder one, grasp the spark plug boot firmly and twist it back and forth while pulling straight up to break it free from the plug. Never pull on the wire itself, because the terminal can separate inside the boot and leave you with a wire that looks fine but misfires. Work one cylinder at a time so the firing order can never get mixed up.

3

Blow out the well and remove the old plug

Before removing the plug, blow any grit and debris out of the spark plug well with compressed air so nothing falls into the cylinder. Fit a spark plug socket with a rubber insert onto a ratchet with an extension, loosen the plug, and lift it straight out. Compare the old plug's electrode color to a plug reading chart — tan or light gray is normal, while oily black or heavy deposits point to other engine issues worth investigating.

4

Gap and inspect the new spark plugs

Check the gap on each new plug with a wire-type feeler gauge against the specification printed on the underhood emissions label, and adjust gently by bending only the ground strap if needed. A plug dropped on the floor should be inspected closely for a cracked insulator and re-gapped before use. Confirm the new plugs match the heat range and thread reach of the originals.

5

Install the new plugs by hand first

Thread each new plug into its hole by hand using just the socket and extension, turning carefully until the plug seats — this finger-start method prevents cross-threading the soft aluminum head. Once seated, tighten with the ratchet about a quarter to a half turn past finger-tight for a tapered-seat plug, or to a snug firm feel for gasketed plugs. Do not over-torque; stripped plug threads in this head are an expensive repair.

6

Install the new wire set

Apply a dab of dielectric grease inside each new wire boot to ease future removal and seal out moisture. Push each boot firmly onto its plug until you feel or hear it click over the plug terminal, then route the wires through their original looms and clips exactly as photographed. Press the coil-pack ends on with the same positive click and confirm each wire sits fully seated at both ends.

7

Finish the remaining cylinders

Repeat the one-at-a-time process for the remaining three cylinders, keeping each wire matched to its original cylinder. Double-check that all four boots are clicked onto the plugs and the coil pack, and that no tools or rags remain on the engine. Reconnect the negative battery cable and reinstall the engine cover.

8

Start up and verify the repair

Start the engine and listen for a smooth, even idle with no stumble or flashing check-engine light. Take the Neon for a test drive including light acceleration and highway cruising to confirm the misfire is gone. If a check-engine light appears, rescan the codes — a P0301 through P0304 points to the cylinder whose wire may not be fully seated.

All Done!

Test your repair before closing everything up. If something doesn't work right, double-check your steps.

⚠️ Common Mistakes to Avoid

  • • Pulling the plug wires by the wire instead of the boot — the 2.0L SOHC wires bond to the plug over time, and yanking the cable separates the terminal inside the boot.
  • • Over-tightening the new plugs — the aluminum cylinder head strips easily; snug the plugs firmly by hand plus a small turn with the ratchet, never gorilla-tight.
  • • Dropping a plug and installing it anyway — a cracked porcelain insulator causes a misfire that feels exactly like a bad wire, so inspect each plug if one hits the floor.
  • • Changing plugs but reusing 100,000-mile wires — on the Neon the wires fail as often as the plugs, so replacing both together prevents a comeback misfire.