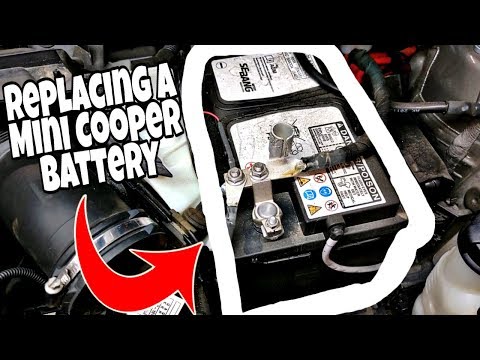
Quick answer: Battery Replacement on a 2007–2013 Mini Cooper is rated Easy and takes about 20–30 minutes. You'll need 4 tools for this job, and parts cost about $147. This guide walks you through the full job step by step, including the mistakes to avoid.
| Part Name |
Part Number |
Price |
Buy |
| Correct group-size battery |
— |
$140.00 |
|
| Terminal cleaner Optional |
— |
$8.00 |
|
| Terminal protectant |
— |
$7.00 |
|
About prices: shown prices are typical retail averages and change frequently; cheaper alternatives may be available. Confirm the current price before buying.
💡 Pro tip: Order all parts at once to save on shipping
Step-by-Step Instructions
Follow these steps carefully
1
Shut the car down completely
Park on flat ground, switch the ignition fully off, remove the key, and set the parking brake. Turn off the lights, heater fan, and stereo. On these second-generation MINIs the electronics stay half-awake for a while after you lock up, so give the car a minute with everything off before you start pulling cables.
2
Open the hood
Quick sanity check: on this generation the Cooper S keeps its battery under the luggage-compartment floor mat instead, so if you find an empty engine bay, you're looking at an S and need the other procedure. Pop the hood and prop it open.
3
Loosen the negative terminal first
Negative off first keeps a slipped wrench from welding itself between the positive post and the body. Loosen its 10mm clamp nut counterclockwise and work the cable off the post, then tuck it to the side where it can't spring back.
🔧 Mechanic's note — Ray Delgado
I do this every single time: If your car has the small intelligent battery sensor box on the negative cable, handle it gently and don't yank the wiring.
4
Loosen the positive terminal
Open the red cover over the positive post and loosen its 10mm clamp nut. Lift the red cable straight off and lay it where the bare clamp can't touch the strut tower, fender, or the loose negative cable.
5
Release the battery hold-down
The R56 battery is clamped into its tray by a hold-down bracket at the base. Loosen its bolt with a socket and extension until the bracket swings free, then lift the bracket out and keep it with its bolt. Note how the bracket bites the foot of the battery — it has to seat exactly the same way on the way back in.
6
Lift out the battery and clean everything
Heave the old battery straight up and out of the tray — it's a tight fit past the cowl, so mind your knuckles — and stand it upright on the ground.
🔧 Mechanic's note — Ray Delgado
I keep a mental note on this one: On a 2007–2013 car the clamps are often green with corrosion; cleaning them properly is the difference between a crisp start and another no-crank morning.
7
Install the new battery, reconnect, and check the manual on registration
Set the new battery into the tray in the same orientation, seat the hold-down bracket on the battery's foot, and tighten its bolt until the battery is solid. Reconnect POSITIVE first, then NEGATIVE last, snugging both 10mm nuts, and refit the red cover and the plastic battery cover. Coat both terminals with anti-corrosion grease, then start the car and check the lights, wipers, and blower. Expect the clock to need resetting. Important: many R56 MINIs with the battery sensor expect the new battery to be registered to the car's computer with a MINI-capable scan tool — check your owner's manual; if registration applies to your car and you skip it, charging behavior and start-stop can misbehave. Recycle the old battery at a parts store.
All Done!
Test your repair before closing everything up. If something doesn't work right, double-check your steps.
⚠️ Common Mistakes to Avoid
- • Assuming the battery is under the hood on a Cooper S — on the S it's under the luggage-compartment floor mat.
- • Yanking the negative cable and damaging the intelligent battery sensor box mounted on it.
- • Skipping the battery registration the owner's manual calls for, then wondering why the charging system acts up.