Quick answer: Front Brake Pads Replacement on a 2005–2010 Scion tC is rated Advanced and takes about 60–90 minutes. You'll need 5 tools for this job, and parts cost about $67. This guide walks you through the full job step by step, including the mistakes to avoid.
| Part Name |
Part Number |
Price |
Buy |
| Front brake pads (correct for 2005–2010 Scion tC) |
— |
$43.00 |
|
| Brake cleaner |
— |
$7.00 |
|
| High-temp brake grease |
— |
$17.00 |
|
About prices: shown prices are typical retail averages and change frequently; cheaper alternatives may be available. Confirm the current price before buying.
💡 Pro tip: Order all parts at once to save on shipping
Step-by-Step Instructions
Follow these steps carefully
1
Loosen the lug nuts and lift
Break the lug nuts loose on the ground, then raise the front onto jack stands at the pinch-weld points — never work under a jack alone. Chock the rear wheels and set the parking brake. Remove the front wheels.
2
Remove the caliper
Unbolt the caliper and lift it off the rotor — note the guide pins. Hang it from the strut, never by the hose. Check for scoring and measure against the minimum stamped on the rotor hat.
3
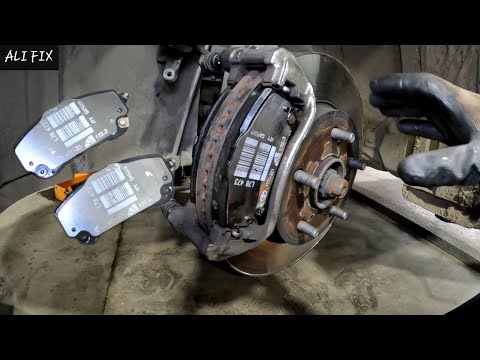
Remove the old pads
Slide the worn pads out, noting the wear-indicator tabs and shim arrangement — the new pads must go back the same way. If the inner pad is much thinner than the outer, the caliper slides were sticking.
🔧 Mechanic's note — Tom Becker
If the inner pad is worn to metal while the outer still has life, I know the slides are the problem — I clean and grease them now, because the new pads will taper the same way.
4
Compress the piston
Open the reservoir cap, press the piston back with a C-clamp. Siphon fluid out first if near full — the piston pushes fluid back up. Press slowly; if it resists, confirm the cap is open and the hose isn't kinked.
🔧 Mechanic's note — Ray Delgado
I press the piston back slowly and watch the reservoir the whole time — brake fluid eats paint, and I've seen it overflow fast when the last shop topped it off.
5
Install the new pads
Clean the pad channels with brake cleaner and a wire brush so the pads slide freely. Fit the pads with their shims as the old ones sat. Grease the pad backs; keep grease off the friction surfaces.
6
Reinstall the caliper
Refit the caliper over the pads and rotor, torque the bracket bolts to the repair-manual spec — don't guess. Confirm pads and shims sit squarely, the hose routes without twists or wheel contact, then spin the rotor for drag.
7
Reinstall the wheels
Refit the wheels, hand-starting every lug nut to avoid cross-threading, then snug them in a star pattern. Lower the car and torque the lugs to spec — about 76 ft-lb (103 N-m) for the wheels. Recheck after 50 miles.
8
Bed the pads
Pump the brake pedal until firm — it sinks near the floor on the first pump while the piston seats; that's normal. Bed the pads with several moderate 30-mph stops, cooling between. Avoid hard stops for the first 200 miles.
All Done!
Test your repair before closing everything up. If something doesn't work right, double-check your steps.
⚠️ Common Mistakes to Avoid
- • Letting the caliper hang by the brake hose.
- • Forgetting to pump the pedal, causing no brakes on first drive.
- • Reusing worn shims that cause squealing.