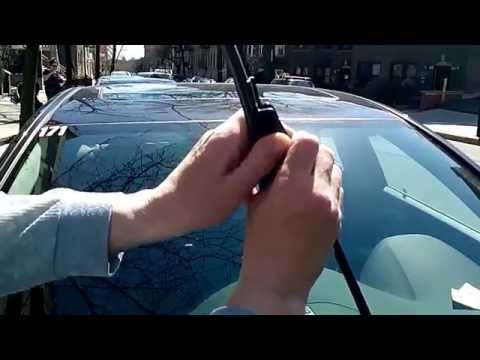
Quick answer: Wiper Blade Replacement on a 2017–2024 Volvo V90 is rated Easy and takes about 15–20 minutes. You'll need 3 tools for this job, and parts cost about $66. This guide walks you through the full job step by step, including the mistakes to avoid.
| Part Name |
Part Number |
Price |
Buy |
| Driver wiper blade, 24" |
Bosch 24A |
$32.99 |
|
| Passenger wiper blade, 20" |
Bosch 20B |
$32.99 |
|
| Rear wiper blade, 13"-14" (measure old blade) |
— |
— |
|
About prices: shown prices are typical retail averages and change frequently; cheaper alternatives may be available. Confirm the current price before buying.
💡 Pro tip: Order all parts at once to save on shipping
Step-by-Step Instructions
Follow these steps carefully
1
Confirm 24/20 — and measure the rear before buying
2017–2024 V90 (and V90 Cross Country, same fitment): 24-inch driver, 20-inch passenger, released by a push button — a top lock. Rear charts split between 13 and 14 inches, so measure the old blade before buying. Not the 1990s V90 — different car, different sizes.
🔧 Mechanic's note — Ray Delgado
I've learned: Lay the old rear blade on the new one in the store parking lot before you pay — the charts split on 13 versus 14 inches, and the wrong one either chatters or misses the edge of the glass.
2
Put the wipers in service position
Do this first: the arms park tucked under the hood lip, and lifting them there chips paint and risks the glass. Service mode cancels if you wipe, wash, enable the rain sensor, or drive, so don't touch those until done.
🔧 Mechanic's note — Tom Becker
I learned the hard way that service mode dies the instant you touch the rain sensor — one wipe with the arms up and the bonnet paint pays for it. I finish everything, step back, and only then switch the wipers on.
3
Fold the arms up and pad the glass
Fold each arm up off the windshield and slide a folded towel underneath. The arms are long and heavily sprung — keep a hand on the arm while positioning the towel. If the blades are frozen to the glass, free them first.
4
Press the button and slide the blades out
Press the button on the blade mounting and pull the blade straight out, parallel with the arm. No twisting, no prying — the top-lock releases with the button held.
🔧 Mechanic's note — Ray Delgado
After the click, I always give the new blade a hard tug toward the tip. One that just rests on the mount will sit there looking fine right up until it leaves the car at motorway speed.
5
Slide the new blades in until they click
Push the 24-inch blade onto the driver-side arm and the 20-inch onto the passenger-side, sliding each in until it clicks and the button seats. Pull firmly to confirm it's locked — a loose blade will depart at motorway speed.
6
Change the rear blade
Fold the rear arm out, grip the blade's inner section by the arrow marking, and rotate it anticlockwise. Fit the new rear blade in reverse and check it clicks. Fit the size you measured: 13 or 14 inches.
7
Exit service mode and test
Fold all three arms back onto the glass — running wipers with arms up scrapes the bonnet paint. Each blade should clear in one wet pass with no streaks. Leave the rain sensor off until you're done.
All Done!
Test your repair before closing everything up. If something doesn't work right, double-check your steps.
⚠️ Common Mistakes to Avoid
- • Lifting the arms in park instead of using the service position, chipping the hood paint
- • Buying the rear blade without measuring — charts disagree on 13 vs 14 inches
- • Forgetting to fold the arms down before leaving service mode
- • Mixing the 24-inch and 20-inch blades between sides