Quick answer: Wiper Blade Replacement on a 2010–2016 Cadillac SRX is rated Easy and takes about 10–15 minutes. Parts cost about $81. This guide walks you through the full job step by step, including the mistakes to avoid.
| Part Name |
Part Number |
Price |
Buy |
| Driver wiper blade, 26" |
Bosch 26A |
$32.99 |
|
| Passenger wiper blade, 17" |
Bosch 17B |
$32.99 |
|
| Rear wiper blade, 12" |
— |
$14.99 |
|
About prices: shown prices are typical retail averages and change frequently; cheaper alternatives may be available. Confirm the current price before buying.
💡 Pro tip: Order all parts at once to save on shipping
Step-by-Step Instructions
Follow these steps carefully
1
Confirm the sizes and buy the blades
The 2010–2016 Cadillac SRX takes a 26-inch blade on the driver side, a 17-inch blade on the passenger side, and a 12-inch blade on the rear liftgate glass. Buy all three — the rearmost blade is easy to forget.
2
Park and prep — no service position needed
Turn the ignition off and verify the wiper stalk is off. Lift one front arm at a time; the SRX is tall, so stand where you can comfortably reach the arm.
3
Release the old blade from the push-button arm
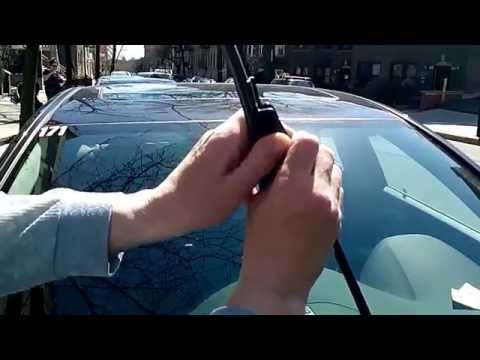
Lift the driver-side arm until it holds, then press the release button on the blade's center adapter. Slide the blade downward off the arm's pin while holding the bare arm firmly with your other hand — never let it snap back onto the glass.
🔧 Mechanic's note — Tom Becker
I've watched people get this wrong: Slide the blade downward off the arm's pin while holding the bare arm firmly with your other hand — never let it snap back onto the glass.
4
Prep the new 26-inch blade
Strip the protective sleeve off the new blade and keep your fingers off the rubber edge. Confirm the blade's adapter is set for the push-button arm — many aftermarket blades use a multi-fit adapter you click into the right position.
🔧 Mechanic's note — Tom Becker
I do this every single time: Strip the protective sleeve off the new blade and keep your fingers off the rubber edge.
5
Slide the new blade on and lock it
Slide the new 26-inch blade up onto the arm until the push button clicks into place. Pull the blade firmly to verify it is locked — the click plus a tug that does not move it is your confirmation.
6
Do the passenger side and the rear blade
Repeat the button-release and install for the 17-inch passenger blade, keeping the 26 and 17 on their correct sides. Then lift the rear liftgate arm, release the 12-inch blade the same push-button way, and click the new one on.
7
Test with washer fluid
Start the SRX, spray washer fluid, and run the front wipers on low and high. Each blade should sweep clean with no streaks or missed bands at the ends. Activate the rear washer and wiper and check the 12-inch blade clears its arc — re-seat any blade that chatters, since that means the button did not fully engage.
All Done!
Test your repair before closing everything up. If something doesn't work right, double-check your steps.
⚠️ Common Mistakes to Avoid
- • Buying two 26-inch blades — the passenger side is only 17 inches
- • Skipping the 12-inch rear blade on the liftgate
- • Letting the bare arm snap back onto the windshield while swapping
- • Not confirming the push-button click, so the blade works loose over time