Quick answer: Engine Air Filter Replacement on a 2011–2016 Buick Regal is rated Easy and takes about 15–20 minutes. You'll need 3 tools for this job, and parts cost about $35. This guide walks you through the full job step by step, including the mistakes to avoid.
| Part Name |
Part Number |
Price |
Buy |
| Engine air filter for 2011-2016 Buick Regal; verify engine, housing shape, and VIN fitment |
— |
$35.00 |
|
About prices: shown prices are typical retail averages and change frequently; cheaper alternatives may be available. Confirm the current price before buying.
💡 Pro tip: Order all parts at once to save on shipping
Step-by-Step Instructions
Follow these steps carefully
1
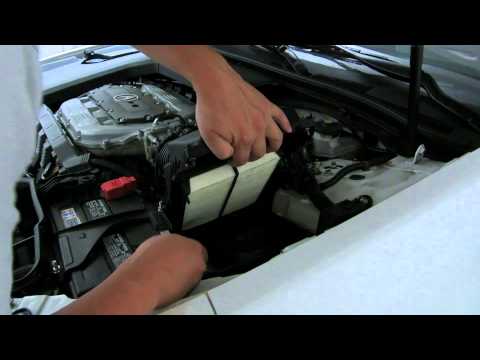
Find the airbox on the driver's side
The black airbox is on the driver's side, feeding the intake tube toward the engine. Both the 2.0L turbo and 2.4L (including eAssist cars) use this same screw-down box. The factory foam nearby is sound deadening — don't remove it.
2
Back out the Torx screws around the lid
About six Torx screws hold the lid — T25 on most, some oddball. Test-fit your bit in one screw first; the wrong size cams out and chews the head. Back them out into a cup — they're easy to lose.
🔧 Mechanic's note — Tom Becker
I've stripped more of these Regal lid screws than I care to admit, back when I trusted one-size-fits-all advice. Test-fit the bit in every screw before you commit — that one oddball screw will eat your bit and leave you extracting.
3
Give the lid slack at the intake hose
Loosen the intake hose clamp at the airbox — just enough that the tube can shift. This gives the lid room to come up without stressing the MAF connector; if the connector is taut, unplug it by its locking tab.
4
Lift the lid and pull the old filter
Lift the lid up and set it aside filter-side-down. Pull the old element and check the housing bottom — Regals collect twigs, bugs, and leaves in there. Note its orientation: pleats up, gasket bedding into the lower box.
5
Vacuum the box and seat the new filter
Vacuum the lower box, then set the new filter flat and centered, gasket in full contact. Press the perimeter — a cocked filter is the usual cause of a post-change whistle. On 2.0L turbos, check no foam got dragged in.
🔧 Mechanic's note — Tom Becker
In my experience, A post-change whistle on a Regal is almost always a cocked filter, not a bad part. Press around the whole perimeter before you put the lid on — the lid can't compress a gasket that's riding up on an edge.
6
Refit the lid and snug the screws evenly
Set the lid back on, re-seat the intake tube, and snug its clamp. Hand-thread each screw first, then tighten crisscross, just snug — they strip easily in plastic. Confirm every screw is back; a missing one leaves a corner lifted.
7
Start it up and verify the seal
Start the Regal and listen at the airbox for hissing or whistling. The 2.0L turbo sounds airy if the lid isn't seated. If the check-engine light comes on, recheck the MAF connector. Replace roughly every 30,000 miles.
All Done!
Test your repair before closing everything up. If something doesn't work right, double-check your steps.
⚠️ Common Mistakes to Avoid
- • Using the wrong Torx size and stripping the soft screw heads
- • Overtightening the lid screws and stripping the plastic bosses
- • Forgetting to re-tighten the intake hose clamp after giving the lid slack
- • Pinching the new filter's edge under the lid instead of seating it flat first