Quick answer: Wiper Blade Replacement on a 2011–2016 Buick Regal is rated Easy and takes about 10–15 minutes. Parts cost about $66. This guide walks you through the full job step by step, including the mistakes to avoid.
| Part Name |
Part Number |
Price |
Buy |
| Driver wiper blade, 24" |
Bosch 24A |
$32.99 |
|
| Passenger wiper blade, 18" |
Bosch 18B |
$32.99 |
|
About prices: shown prices are typical retail averages and change frequently; cheaper alternatives may be available. Confirm the current price before buying.
💡 Pro tip: Order all parts at once to save on shipping
Step-by-Step Instructions
Follow these steps carefully
1
Confirm the Regal’s sizes for 2011–2016
Every 2011–2016 Regal takes a 24-inch driver blade and an 18-inch passenger blade. Buy blades that fit J-hook arms; most ship with an adapter. Do not use 2018-and-newer Regal Sportback sizes (24 and 20).
2
Park and get the blades where you can reach them
Park level, ignition off. The Regal’s wipers park low, tucked under the hood’s trailing edge. If an arm will not lift clear, run the wipers once and kill the ignition when the blades are mid-windshield. Turn Rainsense off first if equipped.
🔧 Mechanic's note — Tom Becker
I do the mid-sweep trick on every Regal that comes in — those tucked wiper arms will scratch the hood edge if you force them. Kill the ignition the instant the blades reach mid-windshield and they’ll freeze right where you can work.
3
Remove the 24-inch driver-side blade
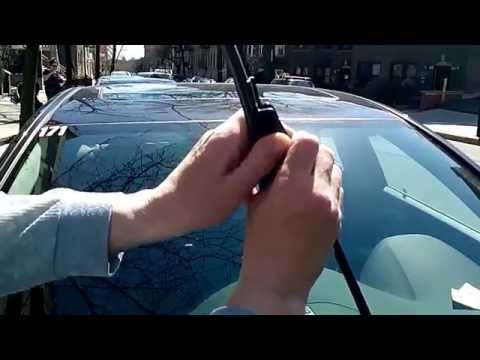
Pull the driver’s wiper away from the windshield. Lift the latch in the middle of the blade and slide the blade down off the J-hooked end. Lay a folded towel on the glass under the bare arm first.
4
Install the new 24-inch driver-side blade
Slide the new 24-inch blade’s connector up onto the J-hook and close the latch until it locks. Tug the blade to confirm it is seated; a half-closed latch lets it walk off the hook. Lower the arm gently by hand.
5
Replace the 18-inch passenger-side blade
Repeat the latch-and-slide procedure on the passenger side with the 18-inch blade. It is 6 inches shorter than the driver’s — check the box label; a 24-inch blade there will over-travel and strike the A-pillar or driver blade.
6
Clean the glass and the sensor area
Clean the windshield with glass cleaner or isopropyl alcohol — new blades chatter on dirty glass. With Rainsense, clean the sensor patch behind the rearview mirror; a dirty sensor makes the auto wipers sweep erratically. Clear clogged washer jets.
🔧 Mechanic's note — Tom Becker
I’ve seen brand-new Regal blades streak because the Rainsense sensor patch behind the mirror was filthy. Clean that spot every time you change blades — a dirty sensor makes the auto wipers sweep at the wrong times.
7
Test every wiper mode and finish
Switch the ignition on, run the washers, and cycle every speed including Rainsense if equipped. Watch for streaks, skipping, or clashing. Replace blades yearly. If a blade streaks in one direction only, re-seat it.
All Done!
Test your repair before closing everything up. If something doesn't work right, double-check your steps.
⚠️ Common Mistakes to Avoid
- • Buying blades sized for the 2018-and-newer Regal Sportback (24 and 20) — the 2011–2016 sedan takes 24 and 18.
- • Forgetting to close the blade’s center latch — the manual’s latch must lock or the blade can slide off the J-hook.
- • Fighting the blades under the hood lip — use the mid-sweep trick to freeze them mid-windshield instead of forcing the arms up.