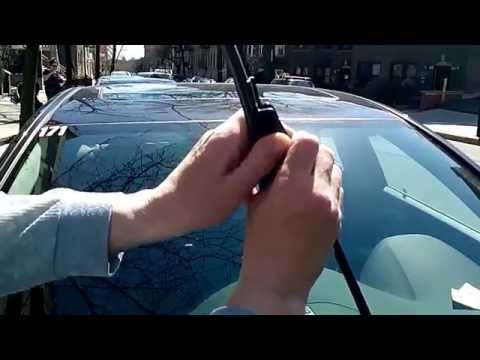
Quick answer: Wiper Blade Replacement on a 2011–2017 Chrysler 200 is rated Easy and takes about 10–15 minutes. You'll need 2 tools for this job, and parts cost about $66. This guide walks you through the full job step by step, including the mistakes to avoid.
| Part Name |
Part Number |
Price |
Buy |
| Driver wiper blade, 24" |
Bosch 24A |
$32.99 |
|
| Passenger wiper blade, 22" |
Bosch 22B |
$32.99 |
|
About prices: shown prices are typical retail averages and change frequently; cheaper alternatives may be available. Confirm the current price before buying.
💡 Pro tip: Order all parts at once to save on shipping
Step-by-Step Instructions
Follow these steps carefully
1
Identify your generation: 2011–2014 takes 24/22, 2015–2017 takes 26/19
The 2015 redesign changed the wiper sizes. First-gen (2011–2014, sedan and convertible): 24-inch driver, 22-inch passenger. Second-gen (2015–2017, sedan): 26-inch driver, 19-inch passenger. Check the door jamb sticker; the pairs aren't interchangeable. Both use J-hooks (9×3 mm); no rear wiper.
🔧 Mechanic's note — Ray Delgado
The 200's mid-generation size split trips up more people than anything else on this car. Check the door jamb sticker before you order — I've seen plenty of 2015 owners running 24/22 blades that came from the old catalog listing.
2
Park, power off, and set up
Park level, ignition off, wiper stalk OFF. No service position — lift arms off the glass. On 2015+ the hood edge sits close, so lift back without levering on the hood. Towel under the arm; one side at a time.
3
Remove the driver-side blade from the J-hook
Lift the arm and find the connector's release tab or button — you press a tab or lift a latch. Slide it down off the hook; keep it parallel — twisting bends hooks. Verify: 24 for 2011–2014, 26 for 2015–2017.
4
Install the new driver-side blade
Feed the J-hook through the connector and slide it up until the tab clicks. Tug — a loose blade can work off over weeks. Lower gently. On rain-sensor cars (2015+), keep the mirror sensor area clean; blades install the same.
5
Repeat on the passenger blade
Repeat on passenger side with length: 22 for 2011–2014, 19 for 2015–2017. A 22-inch blade on a 2015+ car overruns the glass edge; a 19-inch blade on a car leaves a gap. When in doubt, compare against the old first.
6
Inspect the arms and cowl while you’re there
Check the hinge for stiffness or rust — a binding hinge stops even pressure, and new blades can't fix streaking. It should move freely. Clear the cowl grille, run the washers, clear clogs with a pin, top up the fluid.
7
Test both speeds and confirm the park position
Turn the ignition on and run the wipers at all speeds. Watch for streaks, skipped sections, chatter, and clicking meaning a connector isn't latched. Confirm both arms park flat. Tape your sizes (24/22 or 26/19) inside the glove box.
All Done!
Test your repair before closing everything up. If something doesn't work right, double-check your steps.
⚠️ Common Mistakes to Avoid
- • Buying blades for the wrong generation — 2011–2014 takes 24/22, 2015–2017 takes 26/19, and they are not interchangeable.
- • Levering the arm against the hood’s trailing edge on 2015+ cars instead of lifting straight back.
- • Not fully seating the blade on the small 9×3 hook — it can walk off over weeks of driving.
- • Ignoring a binding arm hinge, which causes streaks new blades can’t fix.